Black Ops Cold War Map Intel & Tips
A recent Call of Duty Blog Post has outlined all the Black Ops Cold War Maps, giving players an overview, along with some handy tips and tricks that may be useful in play.
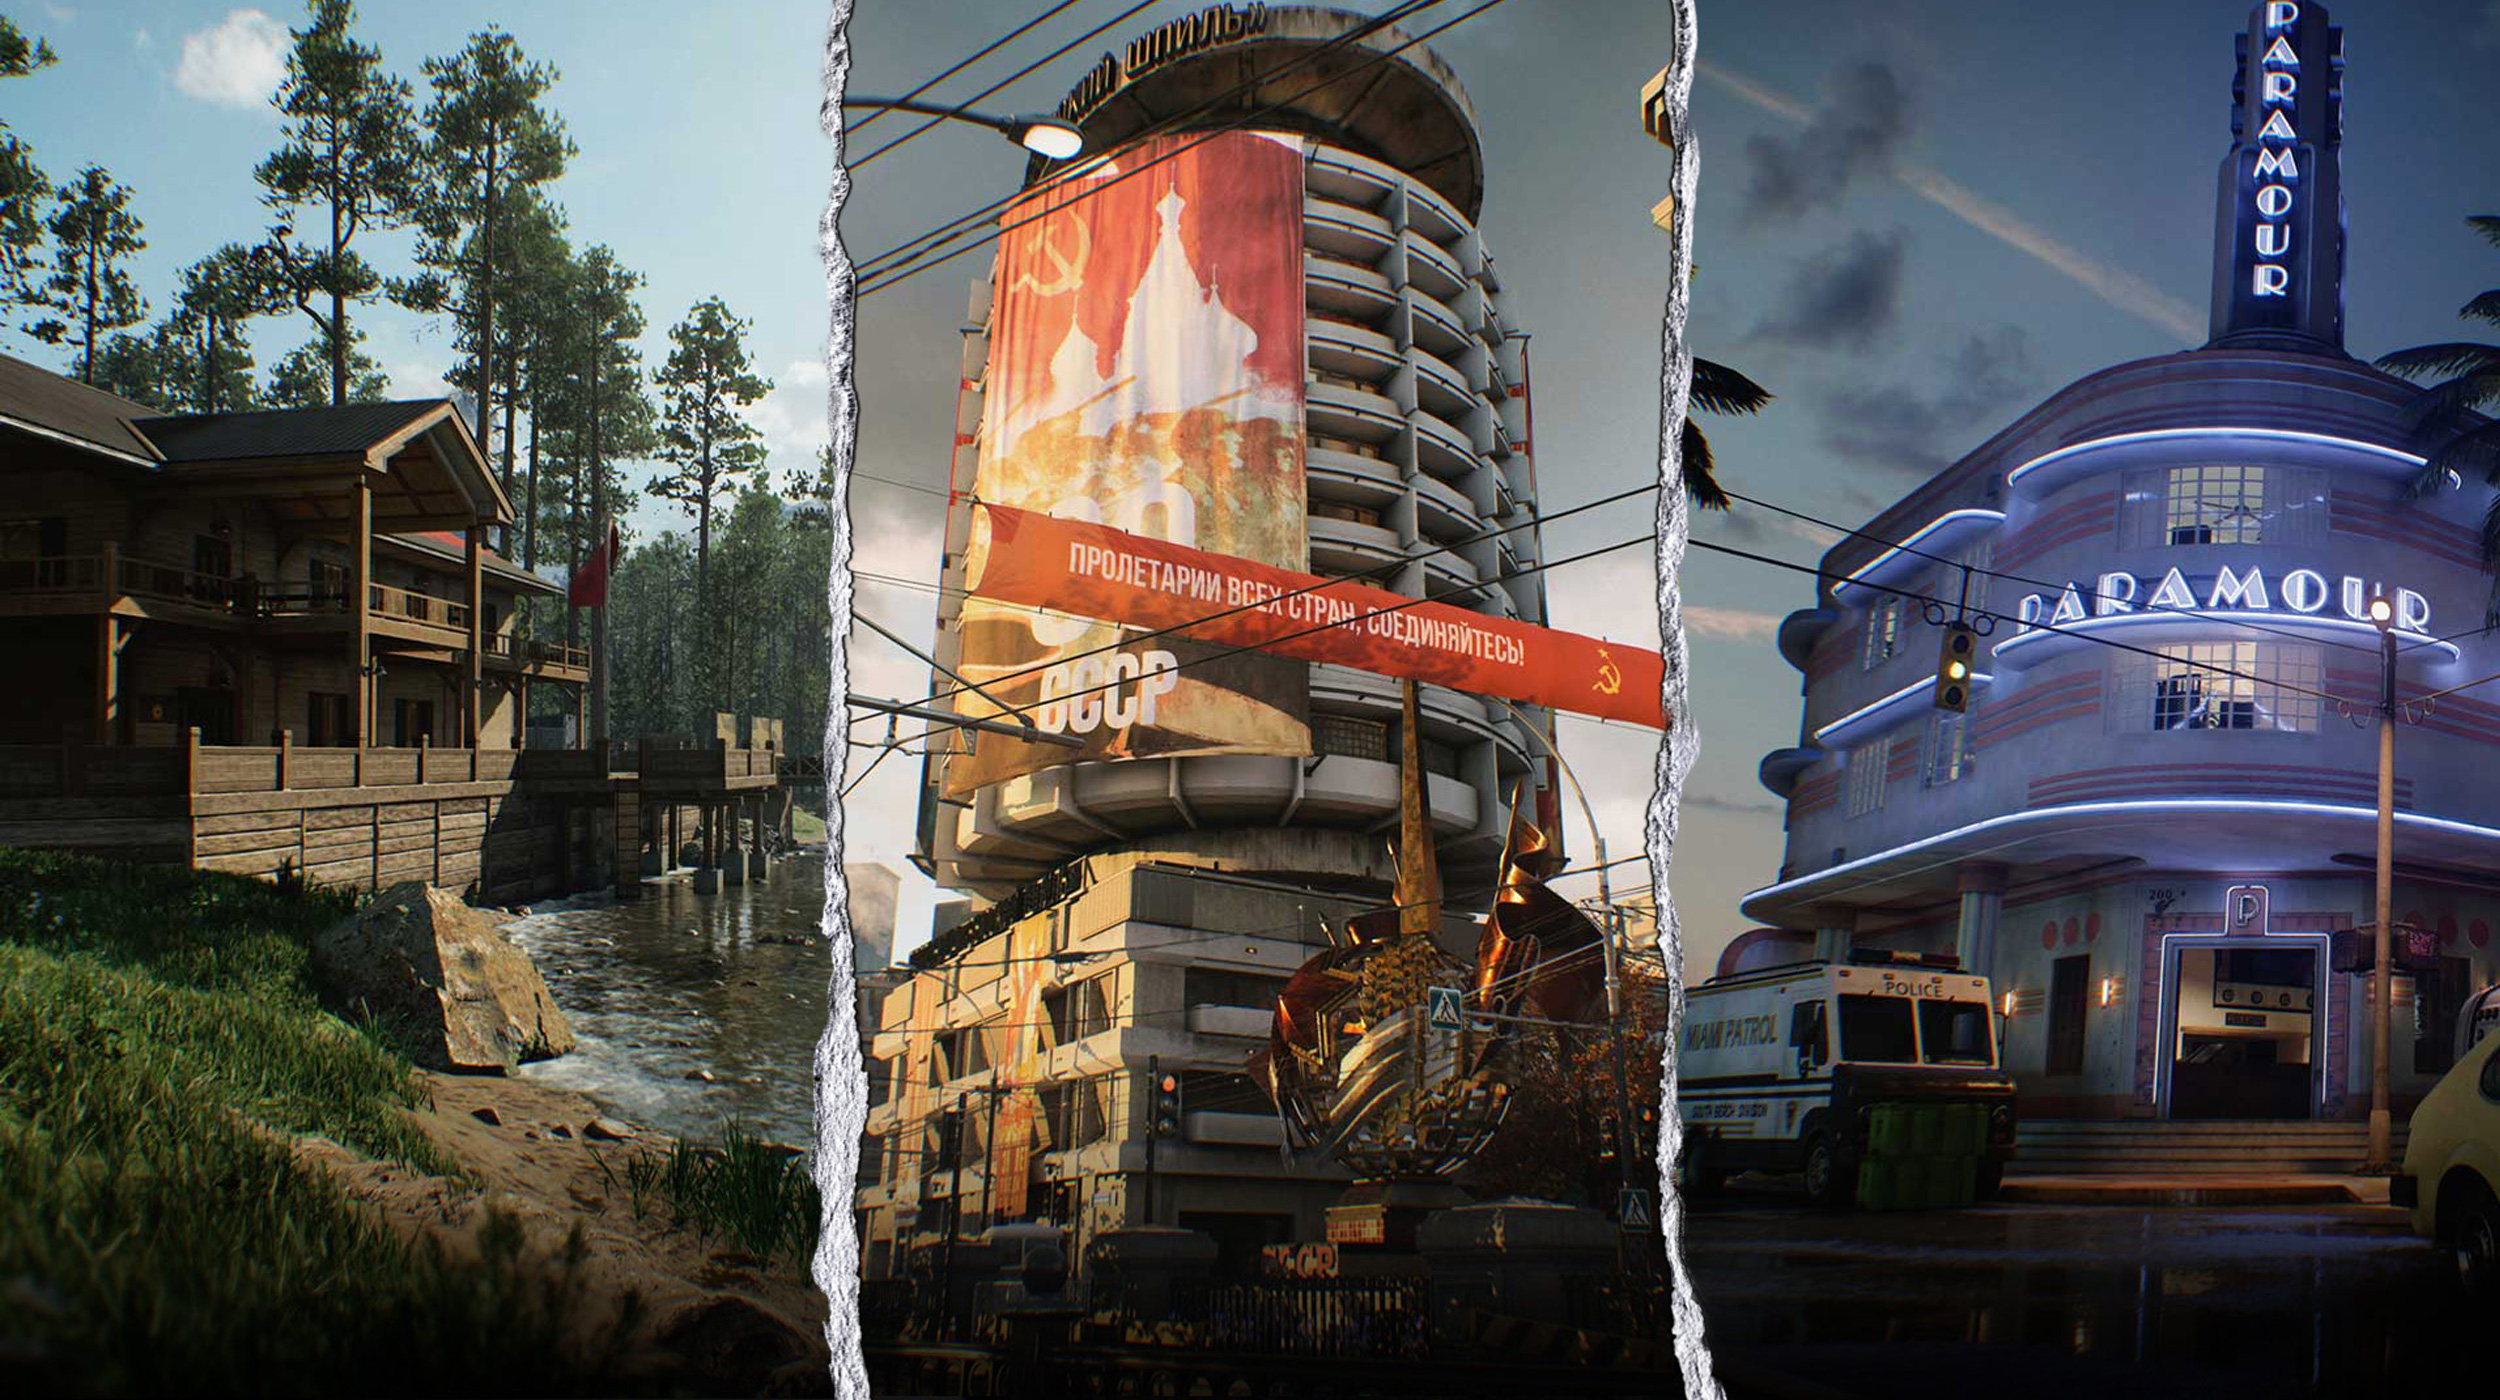
The Day One Black Ops Cold War Multiplayer offering is defined by a global fight across four continents and the North Atlantic Ocean.
Ranging from East Germany to a Soviet ski resort, from the streets of Miami to the deserts of Angola, you’ll need to be prepared to face these vastly different combat scenarios.
Shortly after launch, more maps will be coming including Nuketown ’84 on November 24th and a collection of new maps with Season One on December 10th.
Check out the Black Ops Cold War Map Descriptions and Tips Below:
Two large maps are available for Fireteam – Alpine and Ruka. There are also some small-to-medium maps for “core” 6v6 modes, three of these maps – Armada, Cartel, and Crossroads – also have Combined Arms variants. This expands their boundaries so they can fit 12v12 infantry and vehicle combat.
Fireteam
Alpine
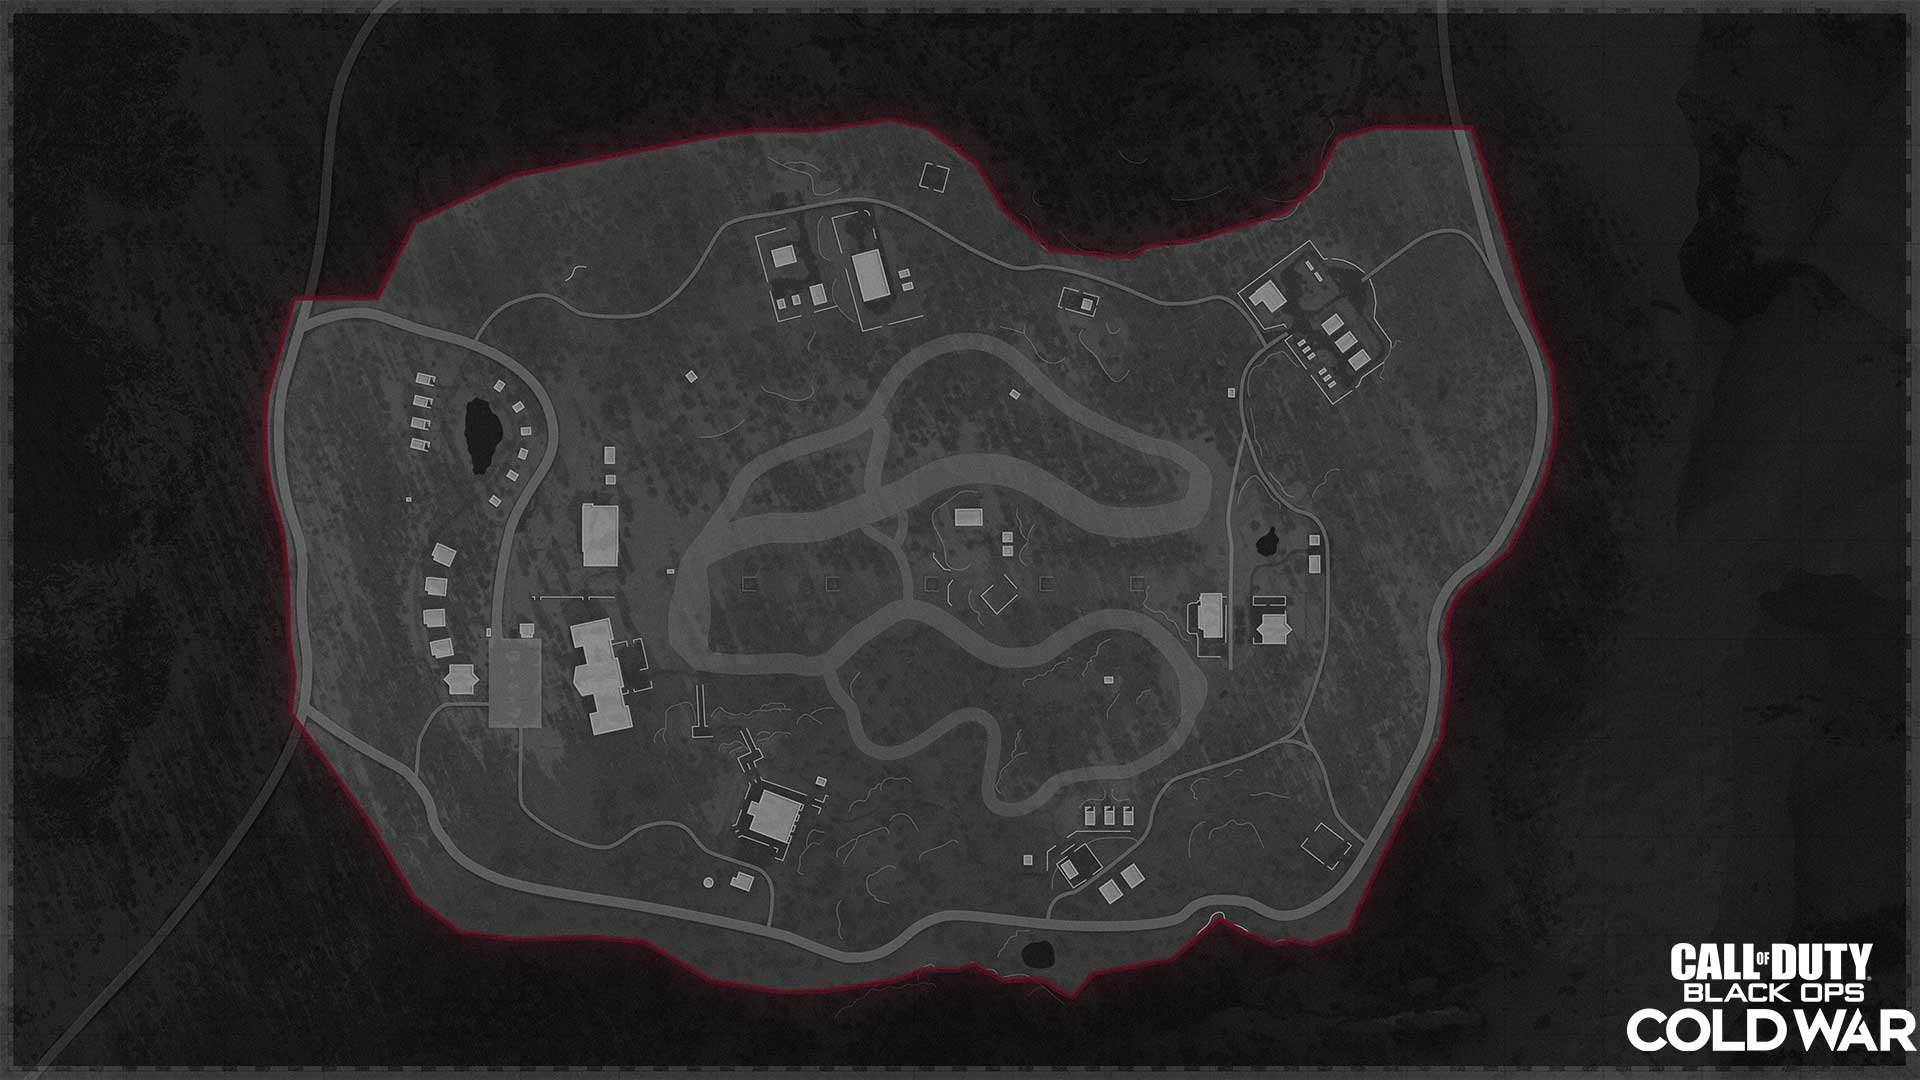
Alpine is a Soviet ski patrol installation that features several slopes which cut from west to east in between and around hundreds of snow-capped trees. Your main vehicle of choice will be snowmobiles, though tanks and helicopters will occasionally spawn in as well.
TIPS
1. Take the High Ground
Consider landing upslope when tackling objectives, as the natural height advantage could be useful when taking out squads. Even if bomb sites are toward the mountain’s base, attacking from above could be a wiser strategy than working your way uphill.
2. Loot Low.
The mountain’s base is a high-risk, high-reward area given that the Lodge, Pro Shop, Base Cabins, and Suites are all great places to find Caches of items, including Uranium. However, since it’s a low-lying area, be wary of other squads coming downslope.
3. Hidden in Plain Sight. While the slopes and roads offer the fastest routes from point-to-point, the woods in and around these areas could be great for flanking or more subtle movements. Combined with Perks like Cold Blooded, advancing through forested areas might be wise if enemy squads are locking down more open areas with aerial Scorestreaks and vehicles.
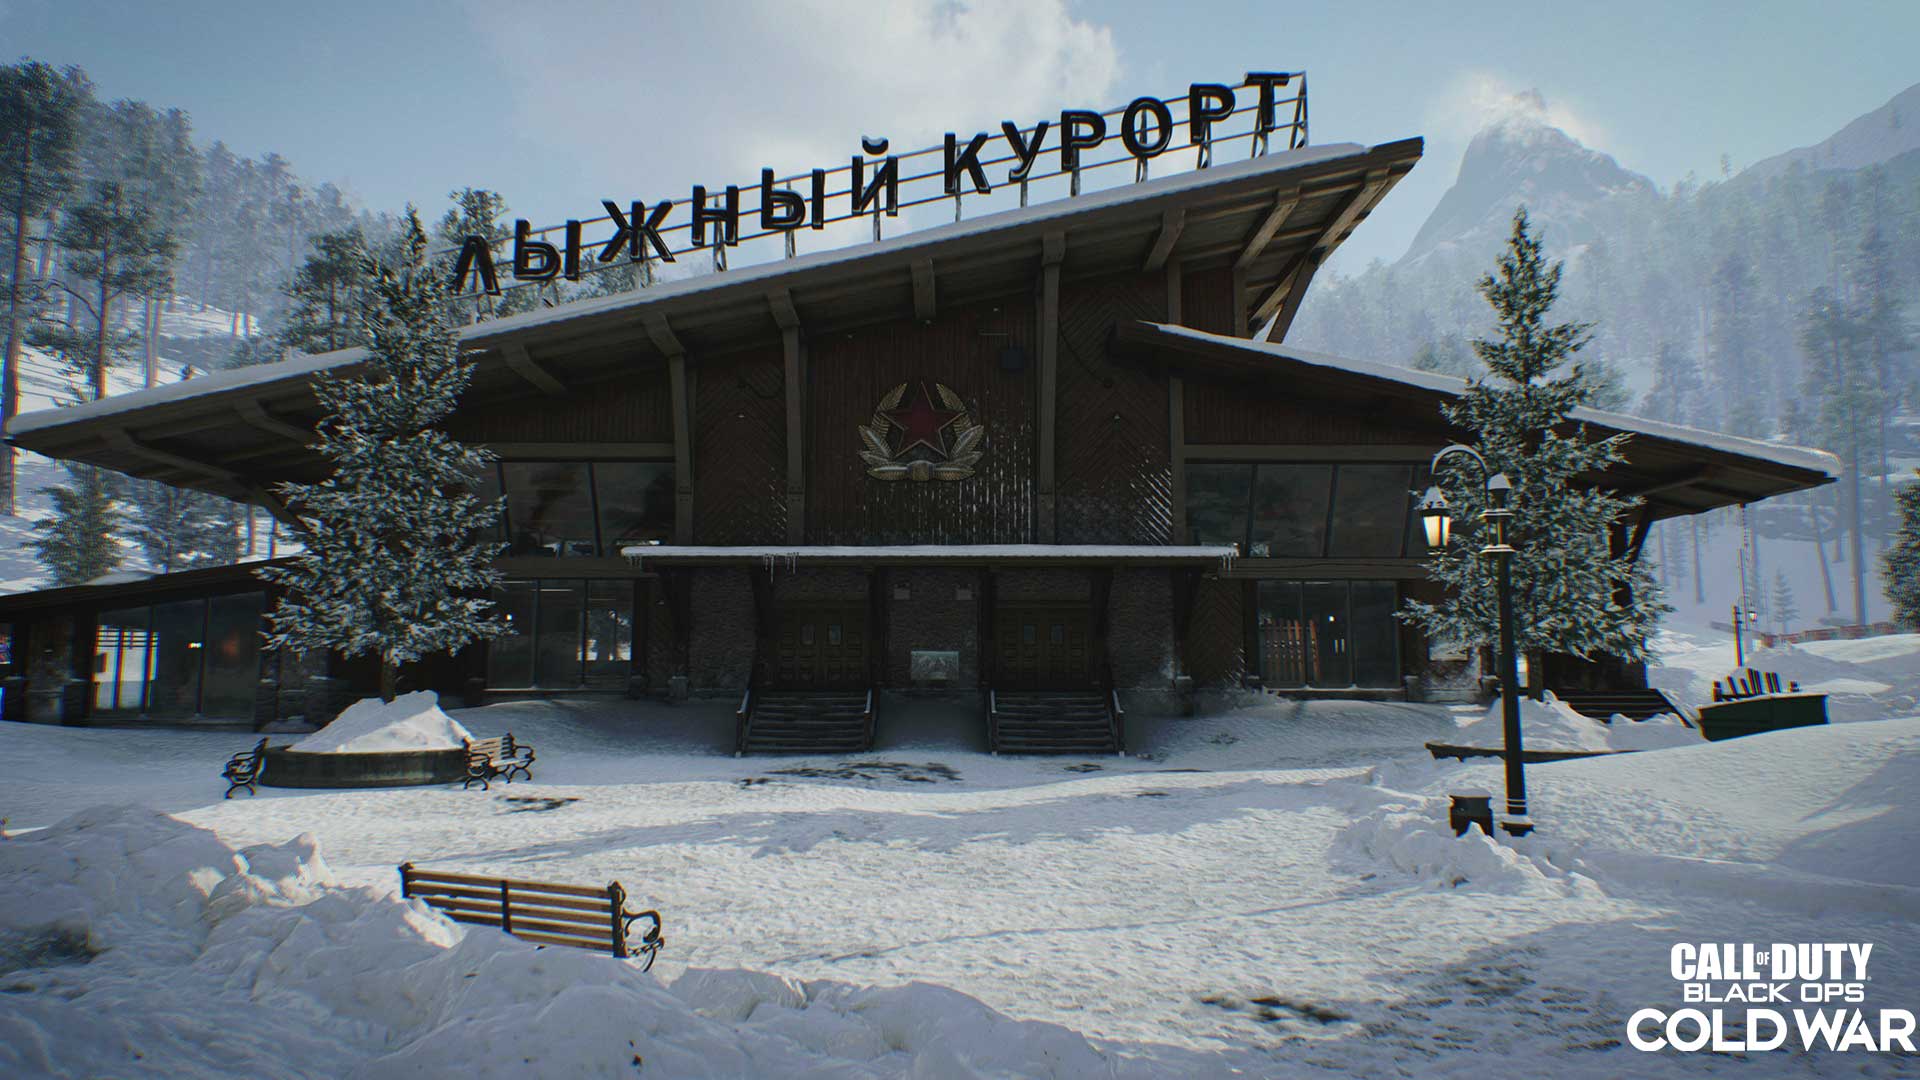
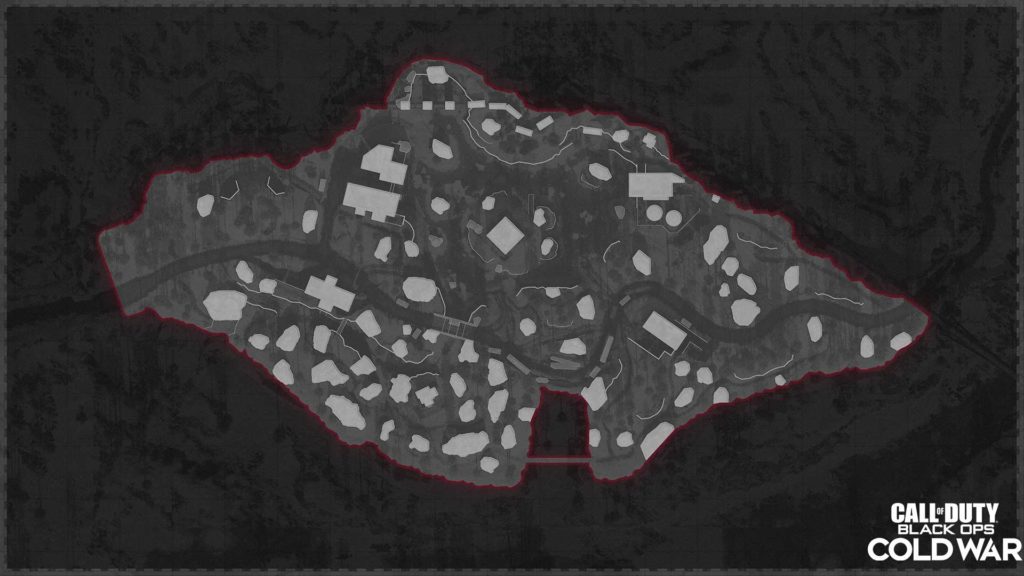
Ruka
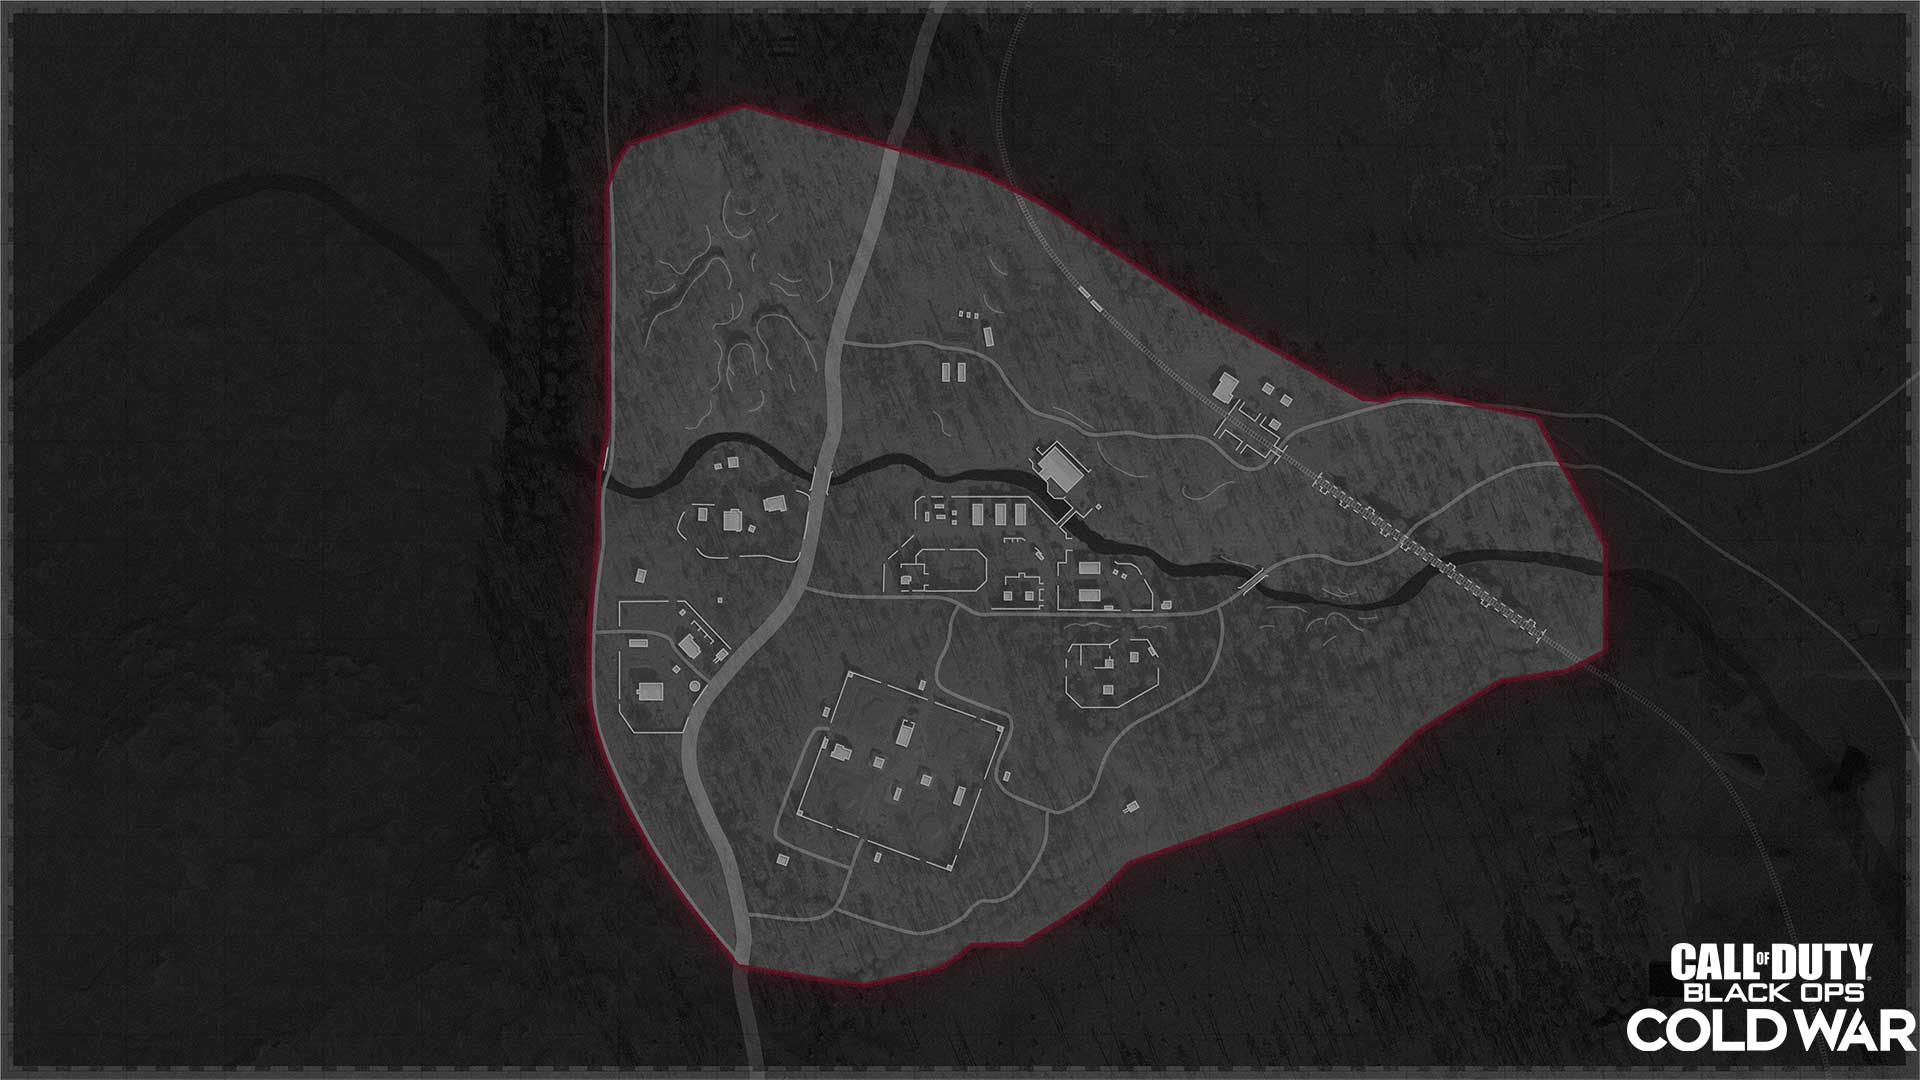
Based in the Ural Mountain region of the western Soviet Union, Ruka is a Spetsnaz GRU training compound situated on both sides of a creek that runs through a dense forest.
Operators will make use of an abundance of military motorbikes to get across the map, with the occasional helicopter spawning in to provide some serious vehicular firepower to any Fireteam match.

Tips
1. Open Season.
Compared to Alpine, Ruka’s dirty bomb locations skew slightly towards “open” areas with nothing but blue sky above. It might be a good idea to bring a Launcher as a Secondary to deal with aerial threats or ground vehicles when reaching more accessible locations like the Train Trestle or Gorge.
2. Battling through the Base.
If you want to use close-quarters weapons on Ruka, try focusing efforts toward the main training ground, including the Base Headquarters. Alternatively, these weapons can do well in fights within the Dacha, Old Farm, and Cargo Platform, but might be out of their element in places like the Missile Silos or the Gorge.
3. Hidden in Plain Sight.
Keep a sharp lookout for item Caches scattered throughout the map. Find them and your squad could come out armed to the teeth with Uranium, Armor Plates, and Scorestreaks.
Core and Combined Arms
Armada
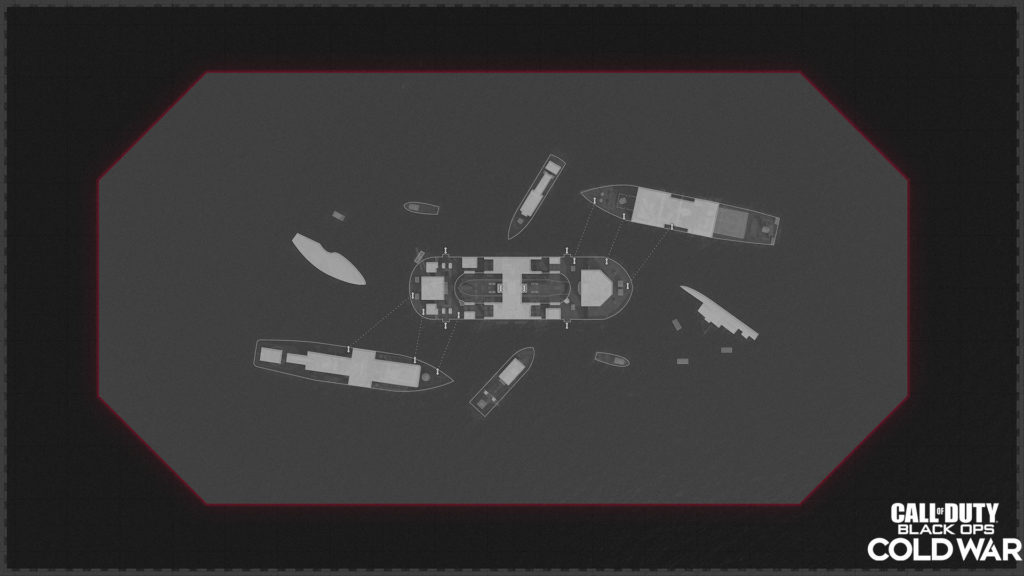
On open seas, inspired by real-life event Project Azorian, CIA-JSCO and Soviet forces converge to recover a sunken prototype nuclear Soviet submarine from the ocean floor.
In 6v6 (smaller map above) battles, Armada offers a more compact experience to get players into the action even faster. In 12v12 Combined Arms (large map above), the map expands to include both a U.S. and a Soviet Union frigate that act as initial spawn points. .
For drivable vehicles, you’re able to use nimble Wakerunners or Gunboats, which include powerful machine turrets that can rip through fellow watercraft, or even whole squads.

Tips
1. Submerge and Subdue
The deep Atlantic Ocean adds plenty of depth to flanking strategies, allowing Operators to dive below the surface and emerge on the other side of the ship. Try doing this if you aren’t finding success on the decks, but remember to occasionally come up for air before you face an unfortunate end.
2. Central Control
Although the Auxiliary Bridge and Machine Shop can command the ship’s front and back respectively, snipers might want to focus on gaining control of the Control Room. Its central location and numerous sightlines can be used to command action on nearly all levels, making it a strong power position in any game mode.
3. Ziplines vs. Rappel Lines
In Combined Arms, there are several ziplines that span from ship to ship. Use these for fast non-vehicle travel between zones, and remember that unlike rappel lines, you can defend yourself while using ziplines by aiming and firing your weapons.
Cartel
Located deep in the jungles of Nicaragua, the leader of an infamous Central American cartel has struck a nefarious deal with Perseus.
CIA operators will be airlifted in, and will land on the west side of the map, which features a banana farm and the cartel kingpin’s home. Meanwhile, DGI forces will come from an eastern checkpoint with a makeshift Camp area and Housing due south.
The map adds the use of Dirt Bikes in 12 v12 combat. Use these to get across the compound quicker, especially through the Main Road and Lower Riverbed routes.
Tips
1. Mow ‘em Down
Advance through the mid-map coca plants while throwing lethal and tactical equipment to weaken players among the plants. Or use the Tracker perk to have hostiles appear on your whole team’s mini-map if you’re aiming at them, making them easier to spot and subdue.
2. Watch the Tower
A ladder is the only way up the map’s central Watchtower, which can easily house an Operator hell-bent on earning Scorestreaks. If an enemy is taking up position here, and they can defend against equipment with a Trophy System, try firing up at them from the Lower Crops or Riverbed.
3. Road and Crop Blocks
Dirt Bikes aren’t going to slice through the north Hangar route in Combined Arms, so prepare to duck behind cover on clearer routes through the Main Road, Upper Crops, and Lower Riverbed areas. If you’d rather tackle these vehicles head-on, try placing Proximity Mines on these routes, or even within the Crops, for a chance at destroying them should they accidentally run over this Field Upgrade.
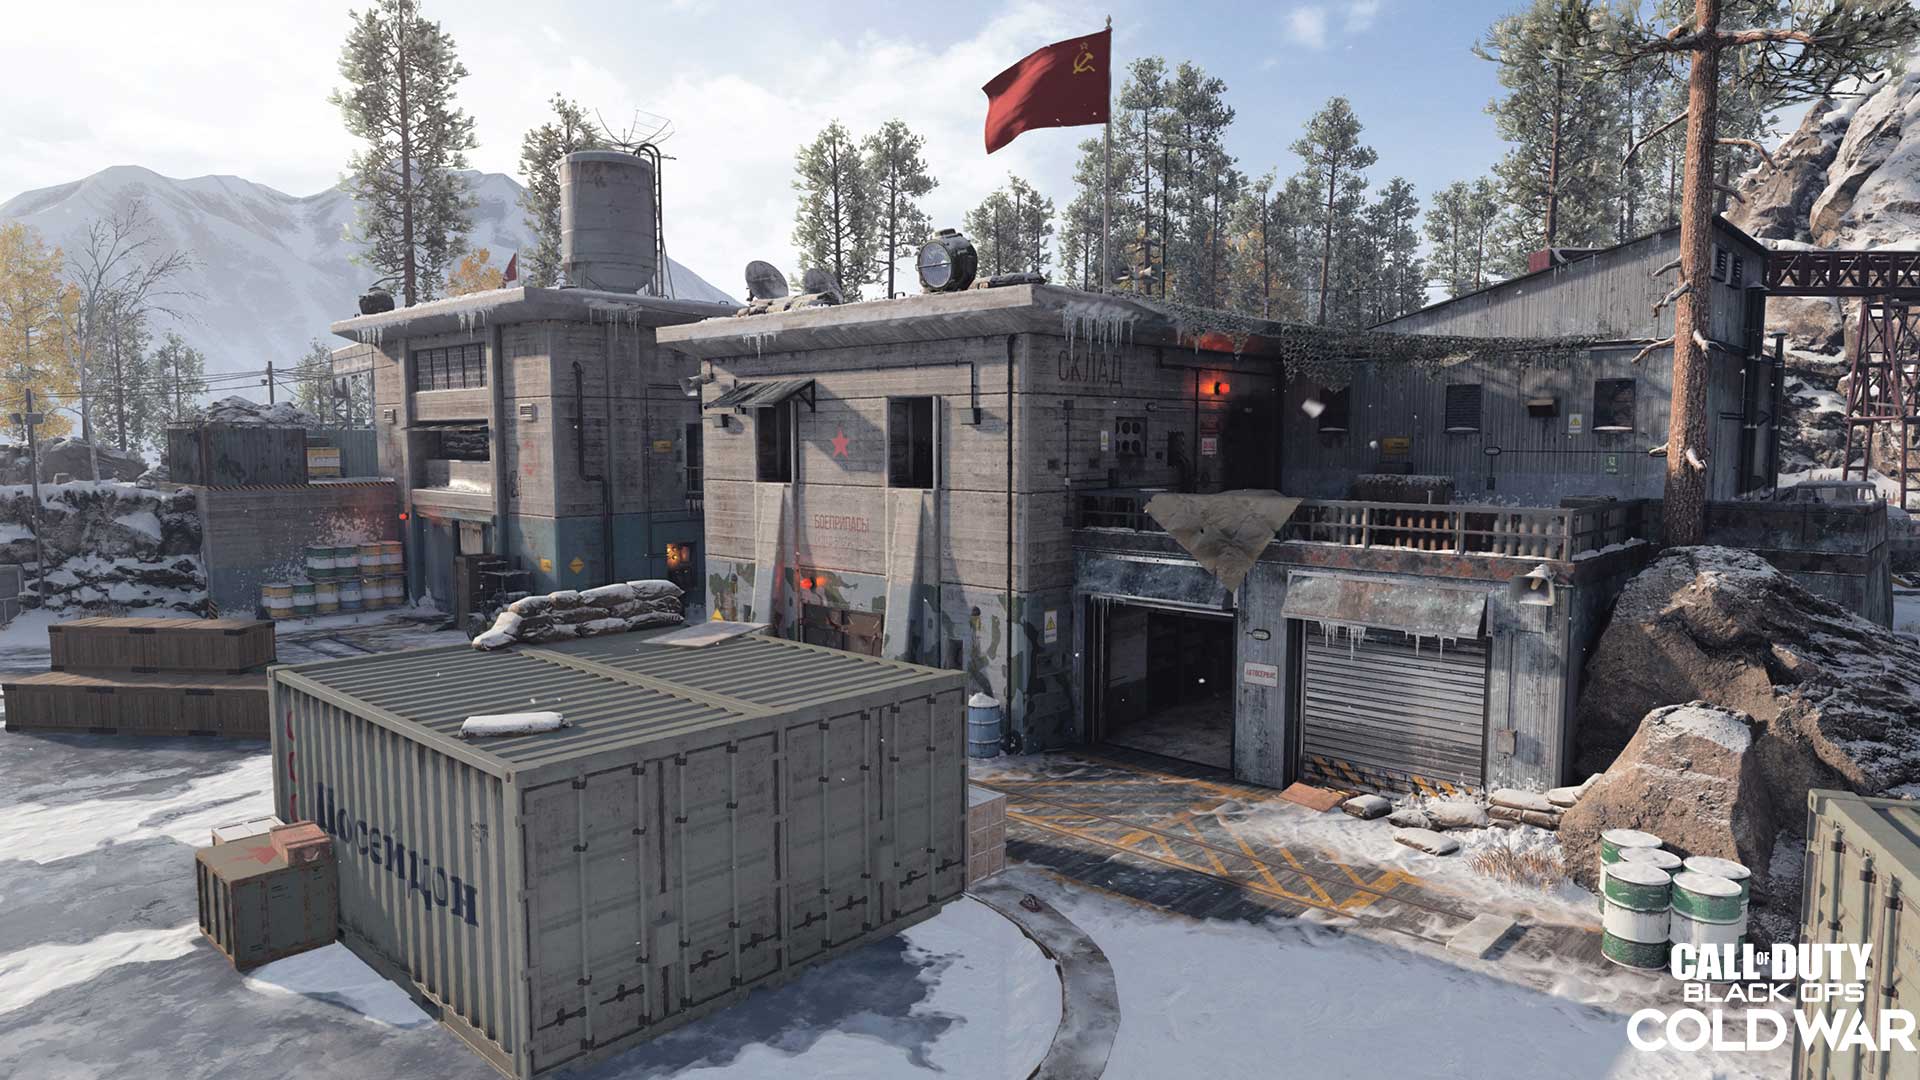
Crossroads
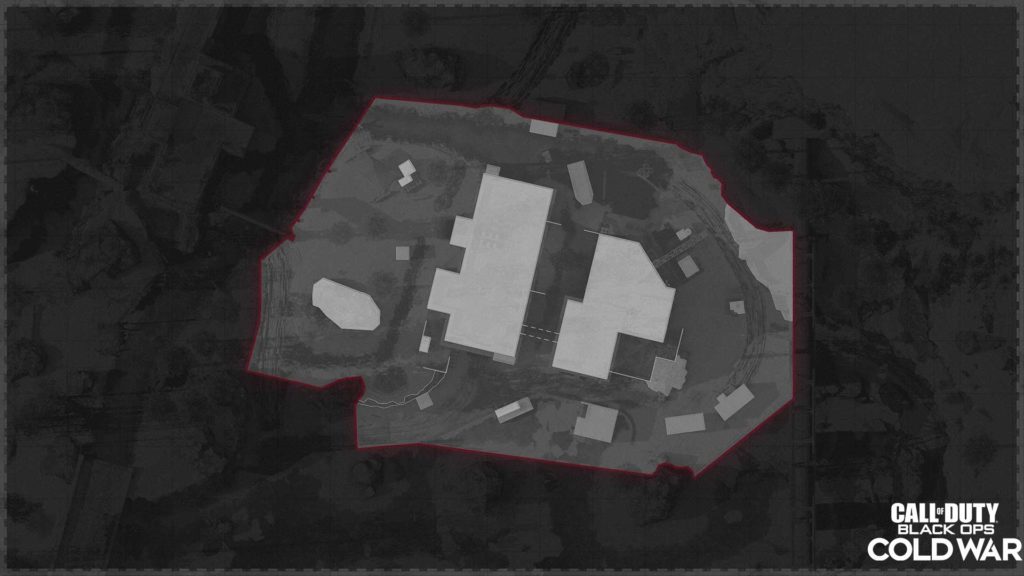
Located at a pivotal route to Afghanistan deep in Uzbekistan, a large Soviet military convoy comprised of mobile ICBM launchers and important cargo is intercepted by NATO forces. Given the amount of top-secret intel on board, a Spetsnaz squad is here to defend it from an MI6 Squadron tasked with intercepting the information and necessary supplies that could bolster the Soviet’s defenses.
The 6v6-sized (smaller) version of this map includes the Annex and Munitions Storage buildings, which are connected via skybridge.
Out of the three initial Combined Arms maps, Crossroads is by far the largest, expanding to over quadruple the size of its 6v6 version for 12v12 play with tanks and snowmobiles included.
Tips
1. No Cold Shoulder for Close-Quarters
Small in size, Crossroad’s 6v6 version is conducive to CQB weapons like SMGs and shotguns, especially when fighting in either building. Snipers may want to stick to the south route over the lake, or swap to a tactical rifle or assault rifle and dominate action between the structures.
2. Snowy Sightlines in Combined Arms
Alternatively, if you play the Combined Arms version of Crossroads, it’s a phenomenal map for sniping. Try taking a position up on the northern cliffs, the Fuel Depot, or any of the western buildings to get some great sightlines over large portions of the map. Or head to the East Boreal Forest to find some snowbanks and ridges for a more secluded sniping spot.
3. Don’t Look Down
Another Combined Arms tip involves using the Boreal Forest and the bridge to avoid the tanks and snowmobiles that will rule the Frozen Lake and roads and flanking around the map. Crossing the bridge is risky, as it’s both out in the open and has an instant death zone through the chasm below. But if all action is focused to the north, taking this route could easily get you behind enemy lines.
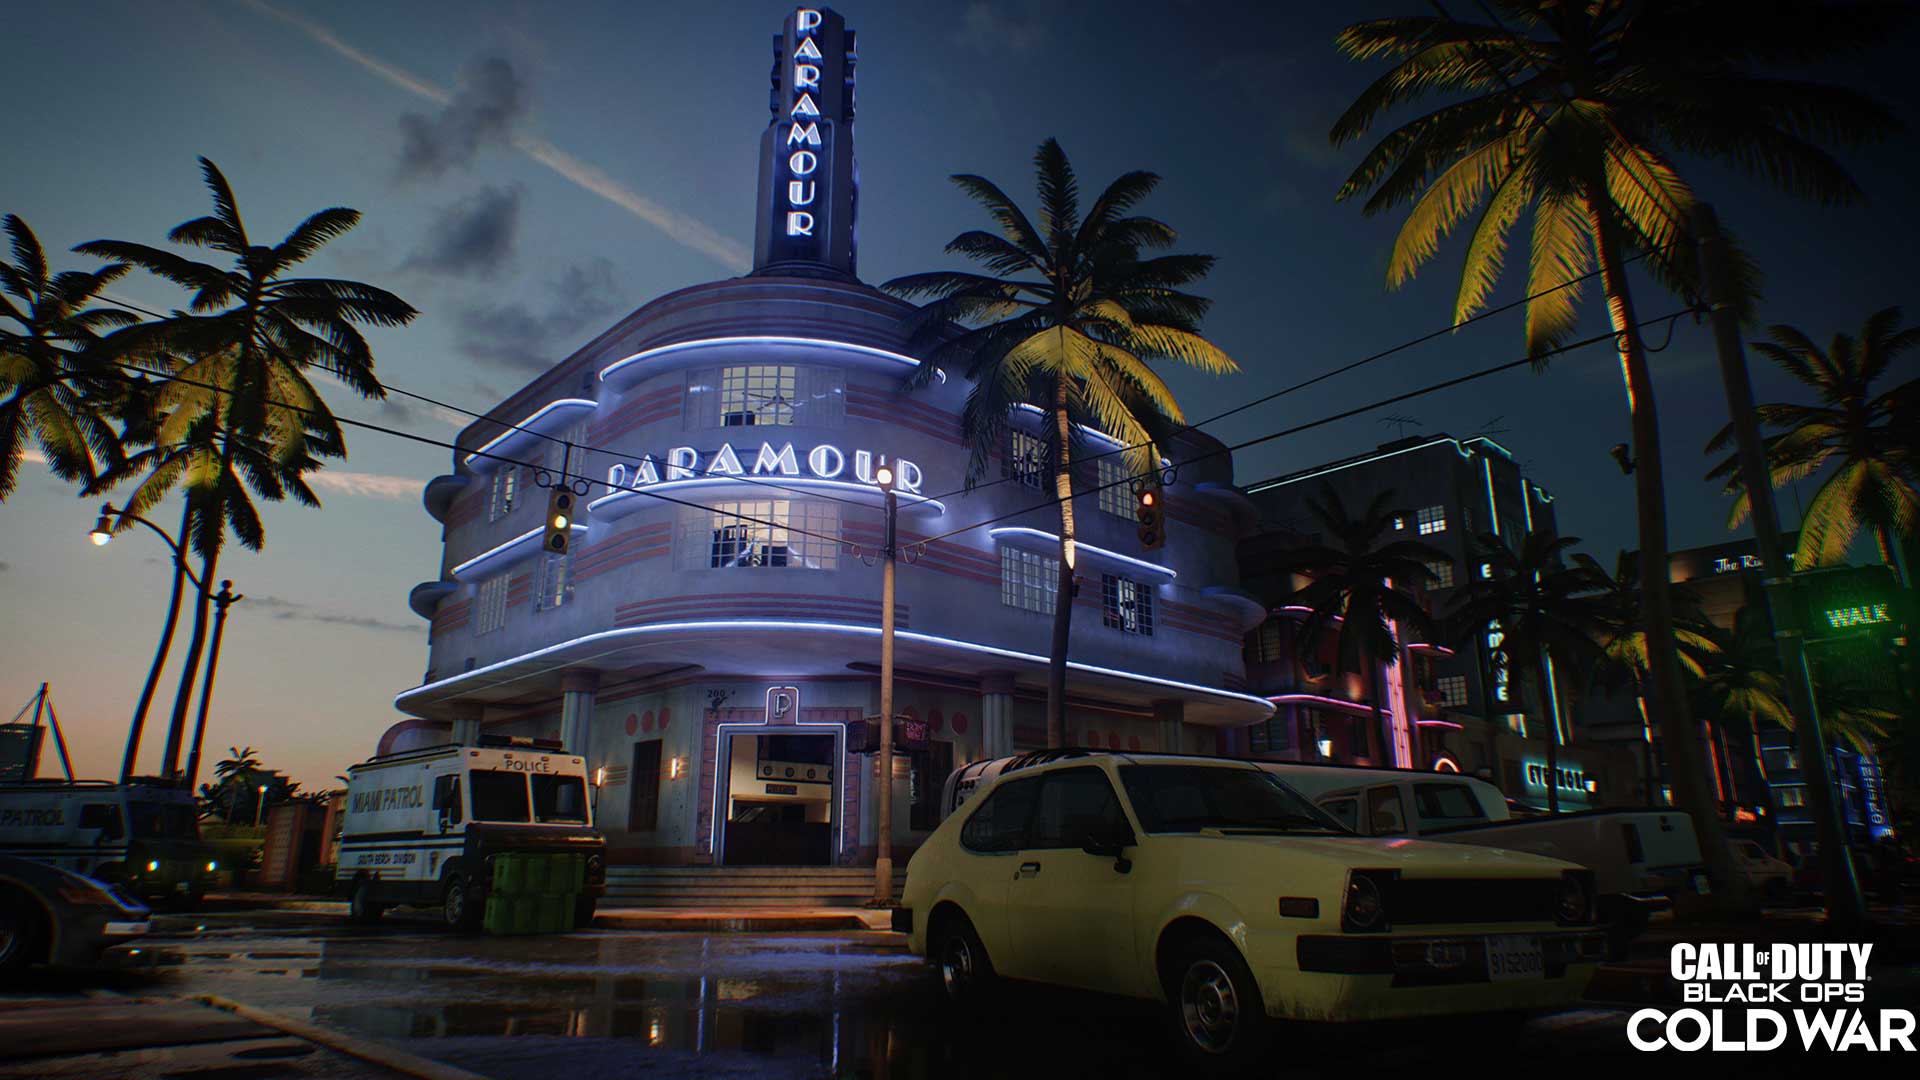
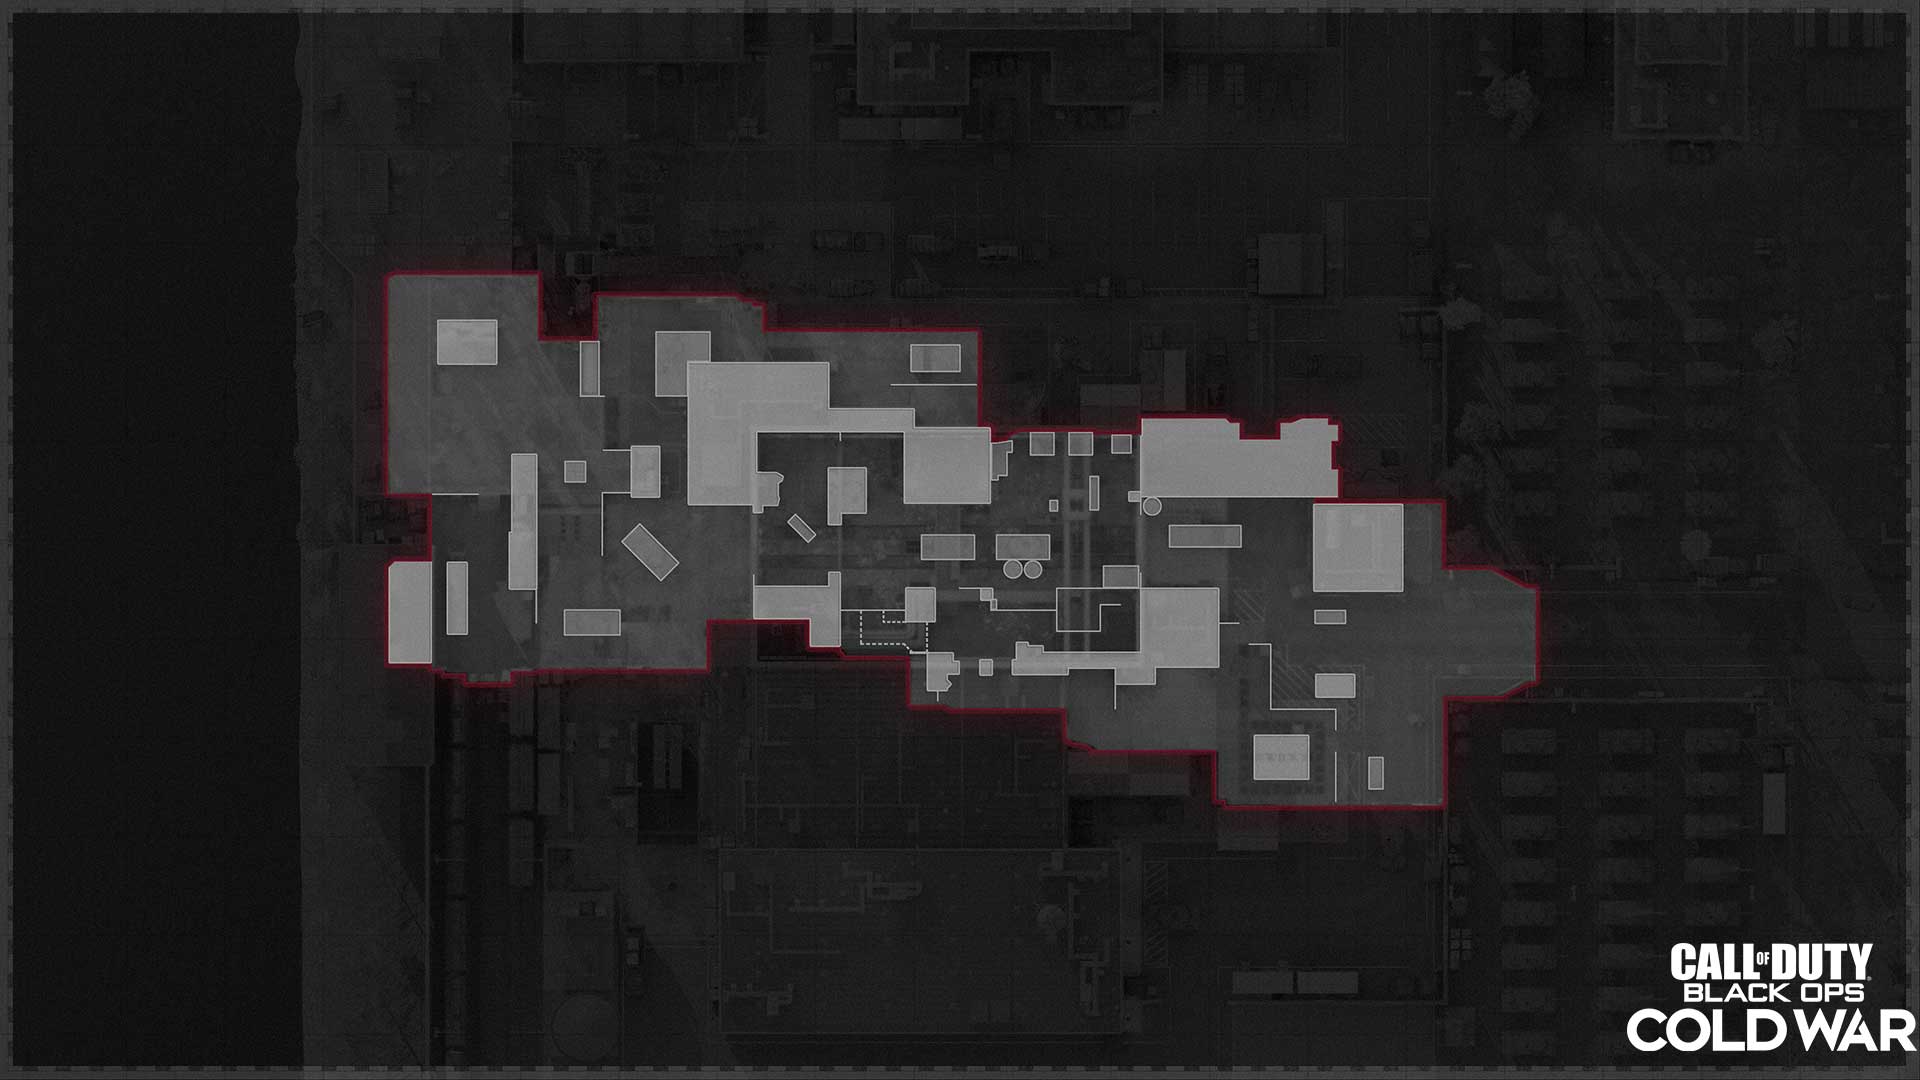
Miami
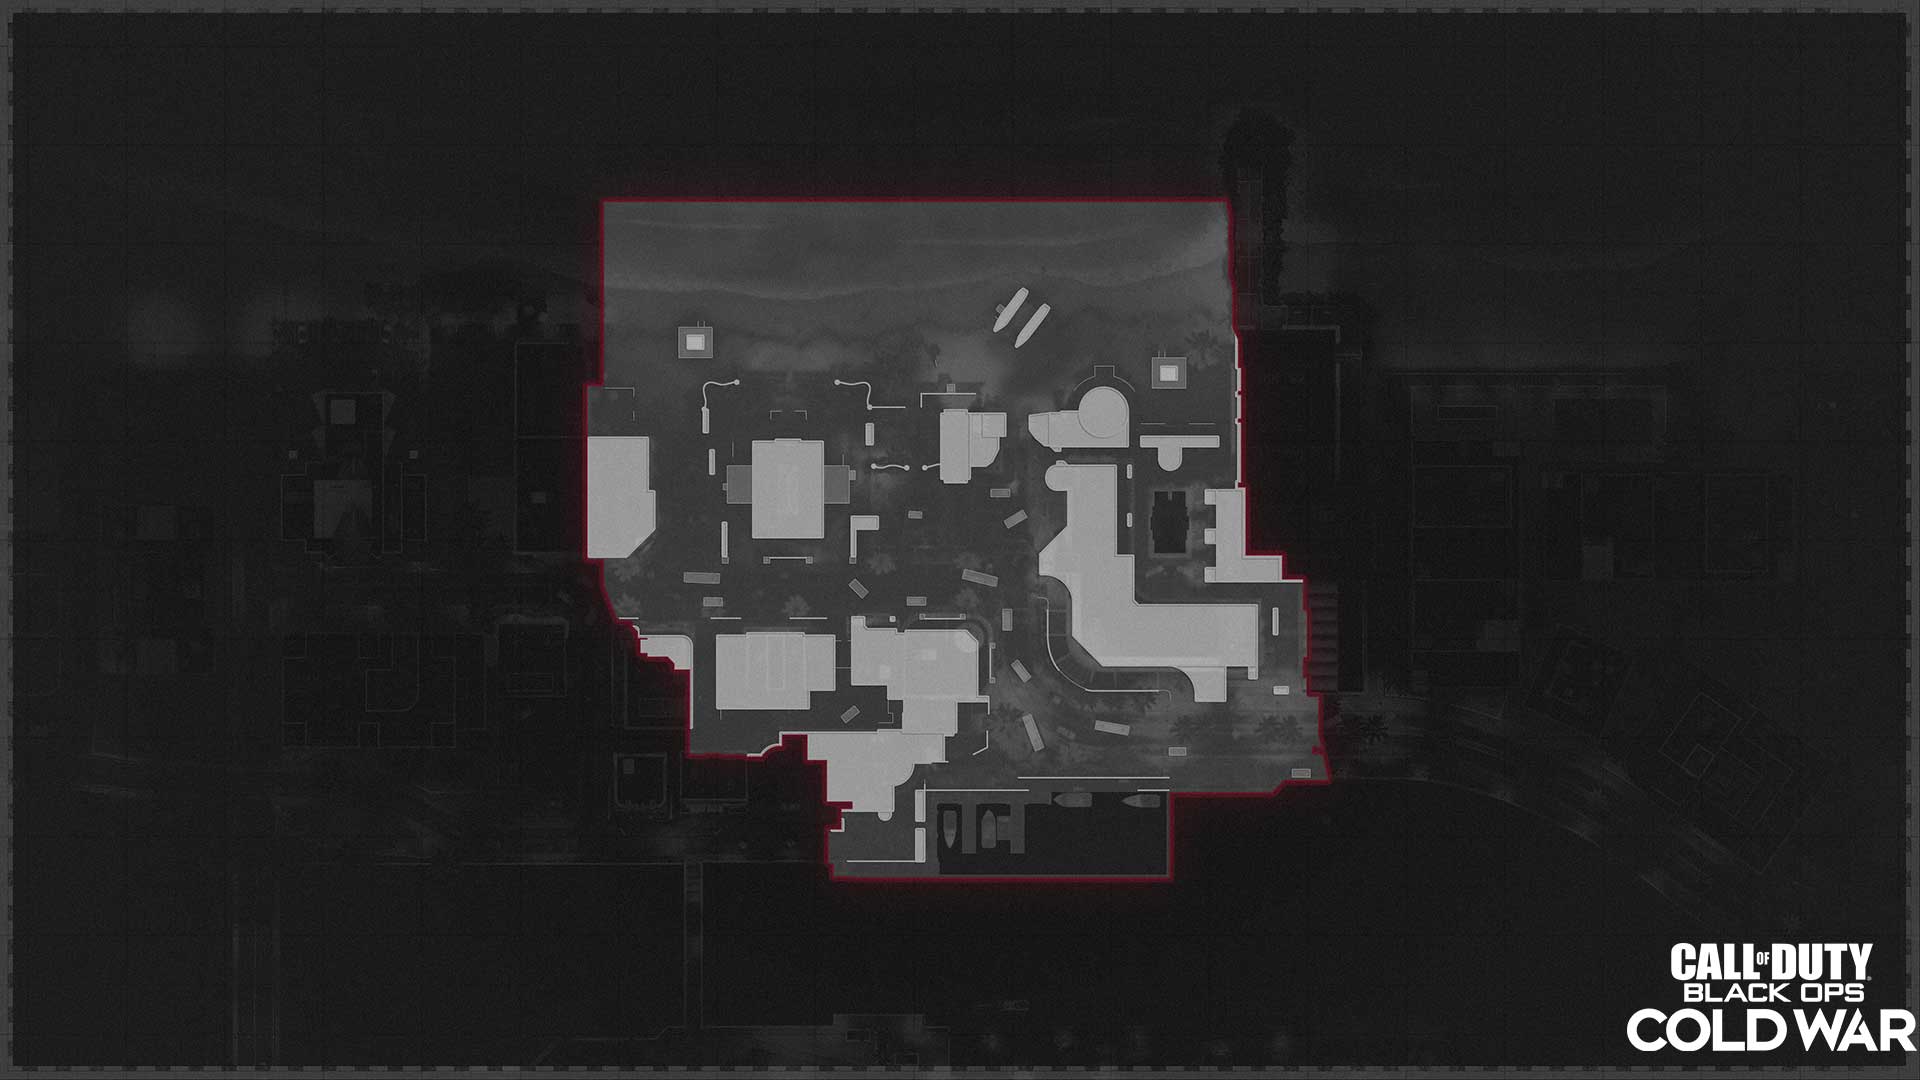
In Miami’s famed South Beach neighborhood, home to posh hotels and neon-clad clubs, a prison transport bus holding one of Perseus’ allies was ambushed by hired DGI forces at the intersection of Ocean Drive and 3rd Street. Barreling through the neighborhood in an unmarked van, CIA special forces arrive at the scene to eliminate remaining DGI agents, hoping to find any clues to Perseus’ whereabouts in the process.
Fighting will take place on Ocean Drive, and on the beach itself, which makes up the entirety of the map’s northern lane with a Catamaran stranded outside a tourist watering hole.
Tips
1. The Heat is on the Street (or the Beach)
Long, uninterrupted sightlines stretch far out over the Beach and Ocean Drive. Bring a long-range weapon to deal with snipers or stick close to the buildings to avoid staying out in the open for too long.
2. Traffic at the Intersection
Especially in objective game modes, the intersection of Ocean Drive and 3rd Street is primed for chaotic combat, seeing how it’s in the crosshairs of several sniping spots and hotel entries. Best not stay here too long, but if you must, use whatever is left of the vehicles as cover.
3. Cannonball!
The pool is open at the Blackwood, and while the hotel is deep within one of the initial infiltration zones, it can be used to cause trouble for the enemy team. Try ducking underwater to throw off enemy fire and test out the diving board to see if it still has some spring to it.
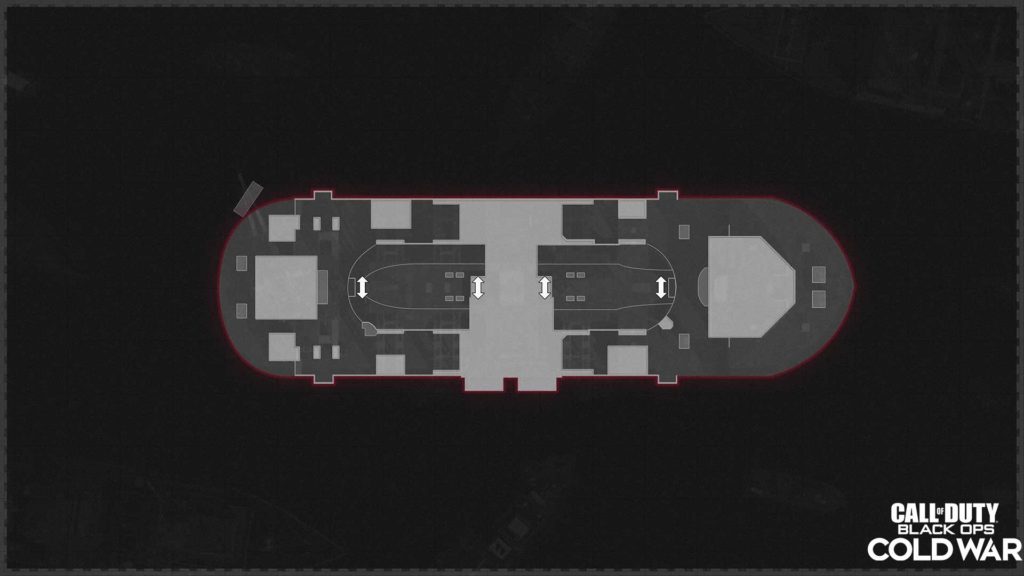
Checkmate

A rectangular map, found on the East German side of Berlin is hangar is home to a hidden Perseus training facility, which was built for special forces to practice an assassination mission against the President of the United States.
With the West German BND dispatched on behalf of NATO to shut down this compound, the East German HVA is prepared to defend it and ensure this key practice ground isn’t compromised.

Tips
1. Brace for Impact
No matter the mode, action will often funnel toward the Plane’s fuselage. Consider focusing your Field Upgrades around this area, such as a Proximity Mine between rooms or a Field Mic underneath the Plane to capture movement above.
2. Angled Attack
All four perches around the Hangar have their own unique sightlines across the map, with containers and the Plane itself obstructing otherwise clear views. Try moving between them as action shifts around the hangar, making sure to check the wings for more aggressive players who want to counter-play these obvious sniping spots.
3. Aerial Maneuvers
Because this map is held exclusively “indoors,” aerial Scorestreaks will have to be angled through the hangar’s openings in order to have any effect. This may lead you to load up on ground and weapon-based Scorestreaks, but if you have great aim, you could easily surprise the enemy squad by threading the needle with a Cruise Missile.
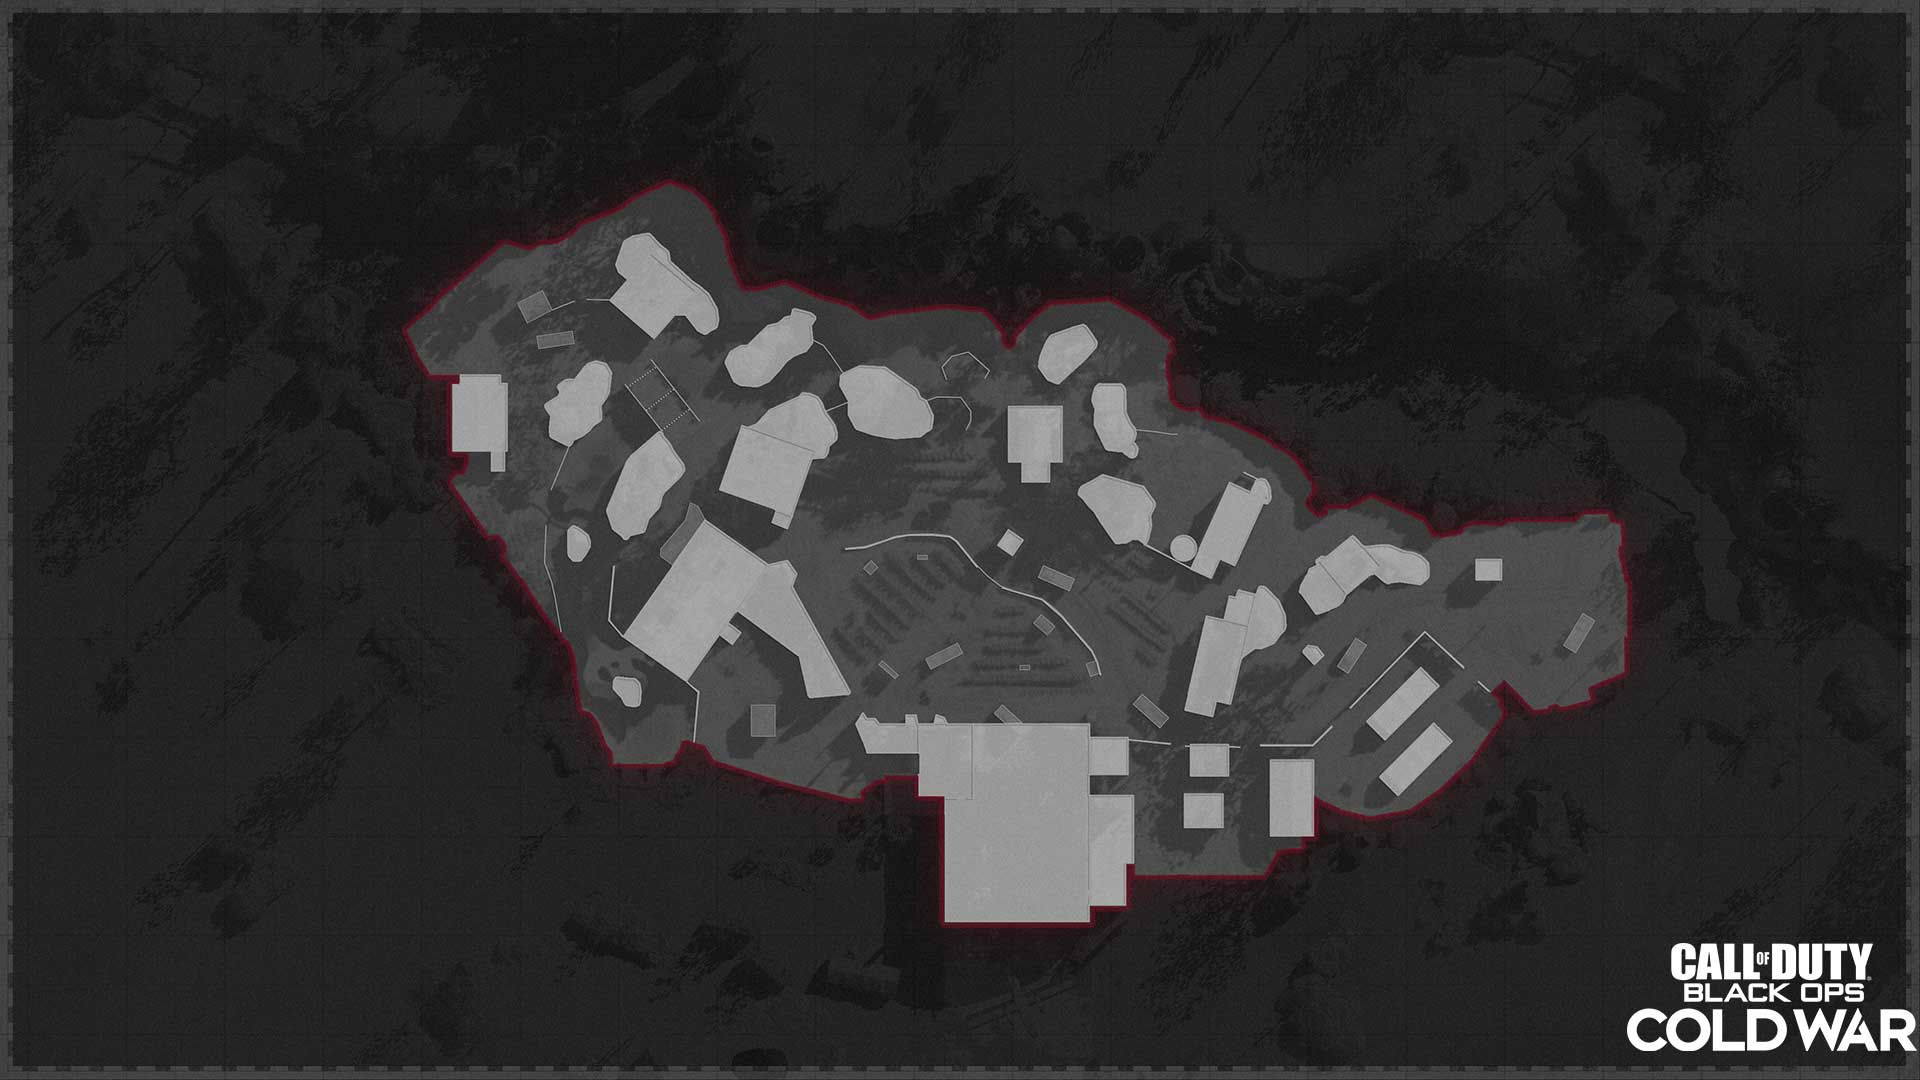
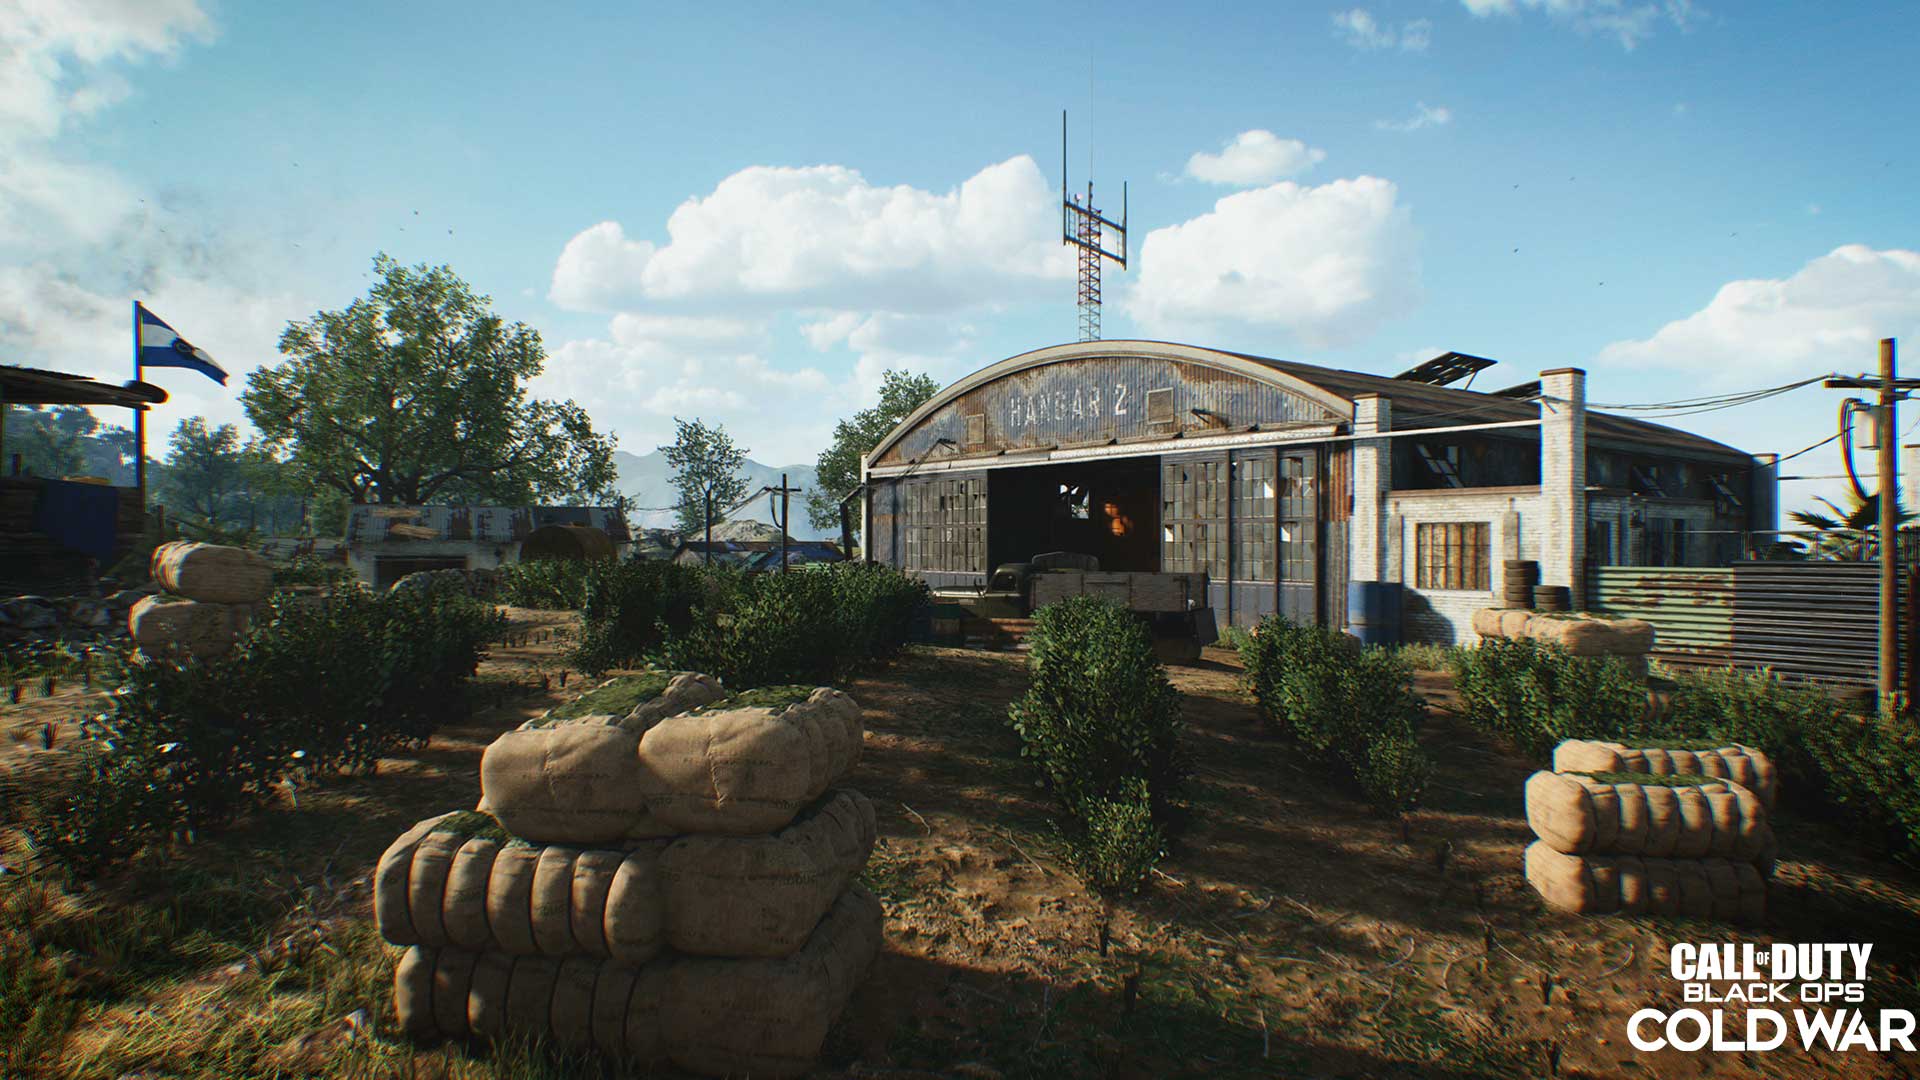
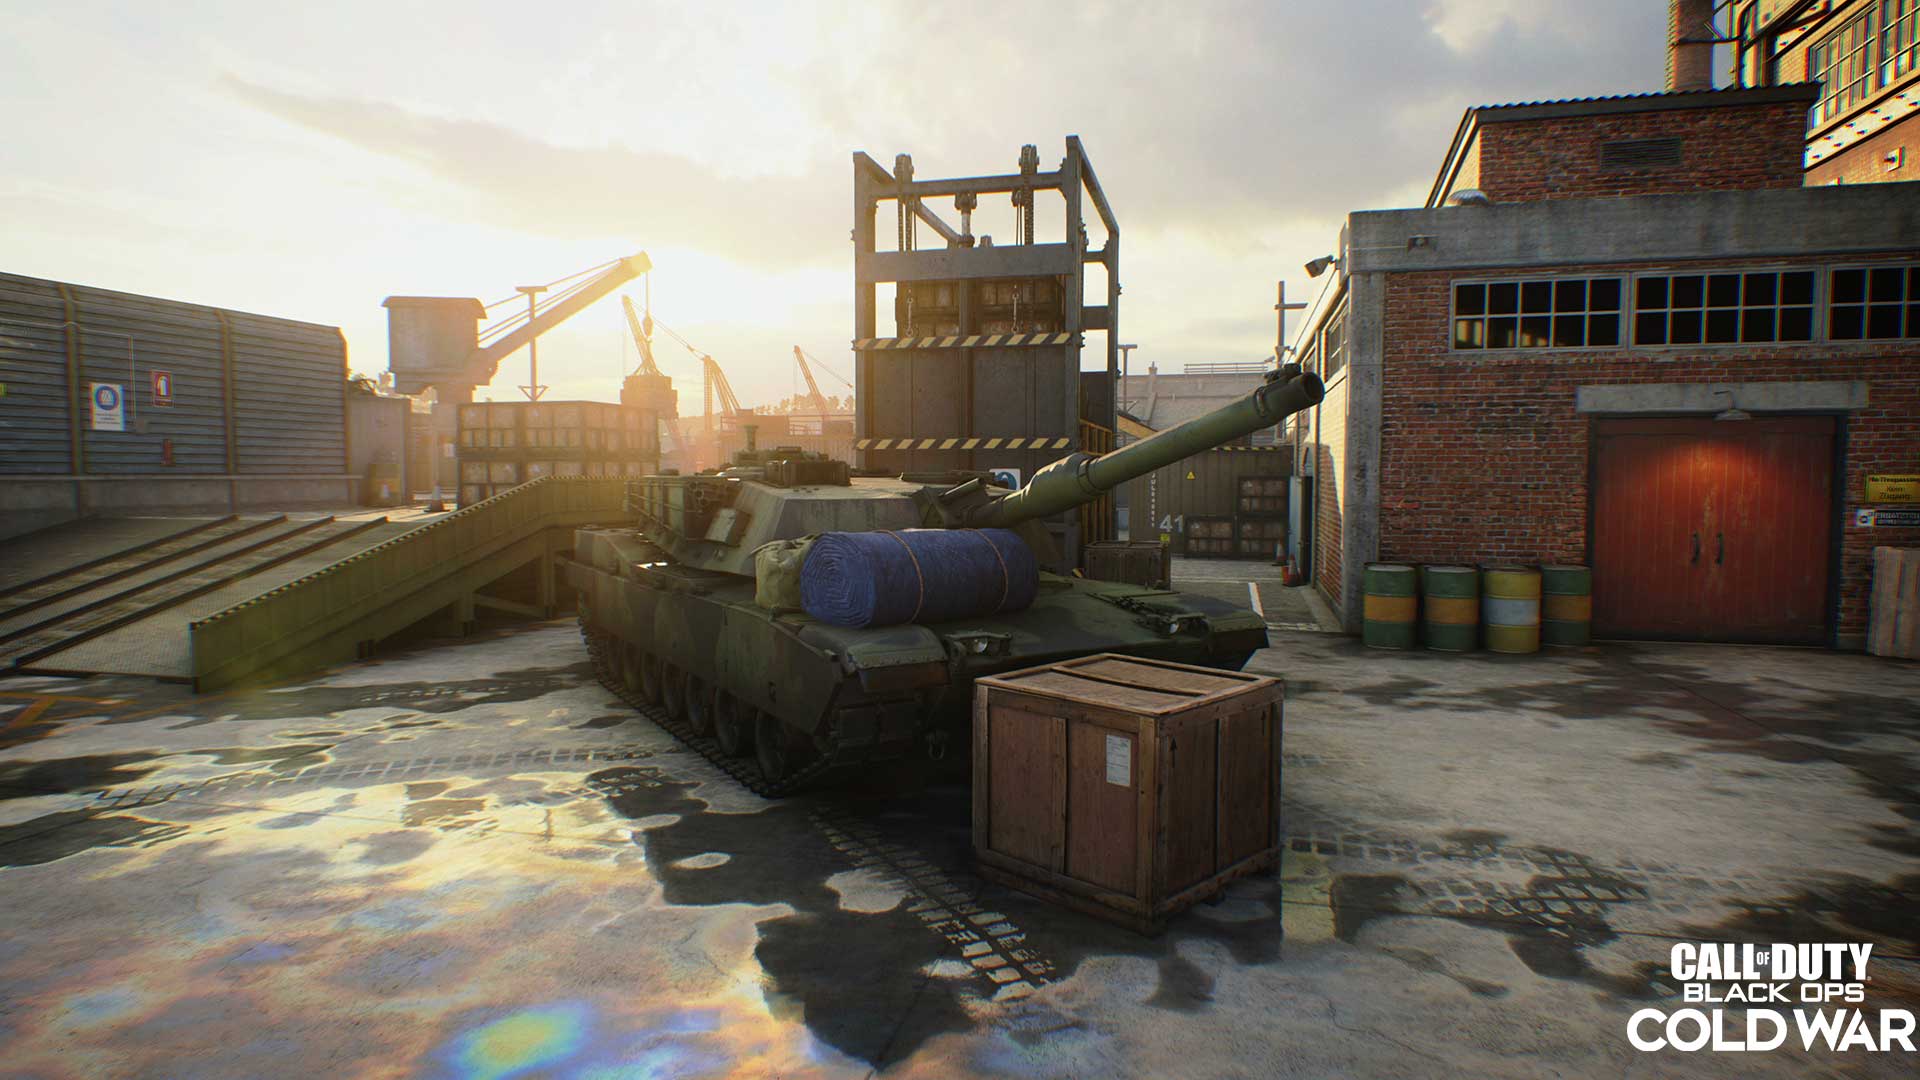
Garrison
A joint military exercise within NATO goes awry in Hanover, West Germany, as Perseus gave the HVA the green light to make a statement against their opposition. Rolling up to the checkpoint on a light tank, a BND fireteam was already well-prepared for a live fire exercise, but now must fight their eastern adversaries to ensure this tank factory continues to strengthen NATO’s front-line defenses.
Tips
1. Smoke Out the Crawlspace
Close-quarters players are likely to take advantage of the Crawlspace and Trench paths, given that they are partially hidden and force combat into a confined space. If you’d rather not fight fire with fire, use tactical and lethal grenades instead to force these enemies out into more open space.
2. Pivot to Mid-Range
With long sightlines few and far between on this map, snipers may want to come prepared with alternative loadouts that either include a low-magnification optic on their sniper rifle or one that uses another type of rifle altogether. If you’re not using a CQB weapon on this map, try to keep your distance from corners and entryways, save for the two massive openings used by the tank conveyor belt.
3. Don’t Look Up
The main building’s roof is in complete tatters, turning this otherwise closed space into a hotbed for aerial Scorestreak fire. Those about to face these threats should opt to hide in other structures, such as the HVAC and Garrison, or take to the Crawlspace and Trench in a worst-case scenario.
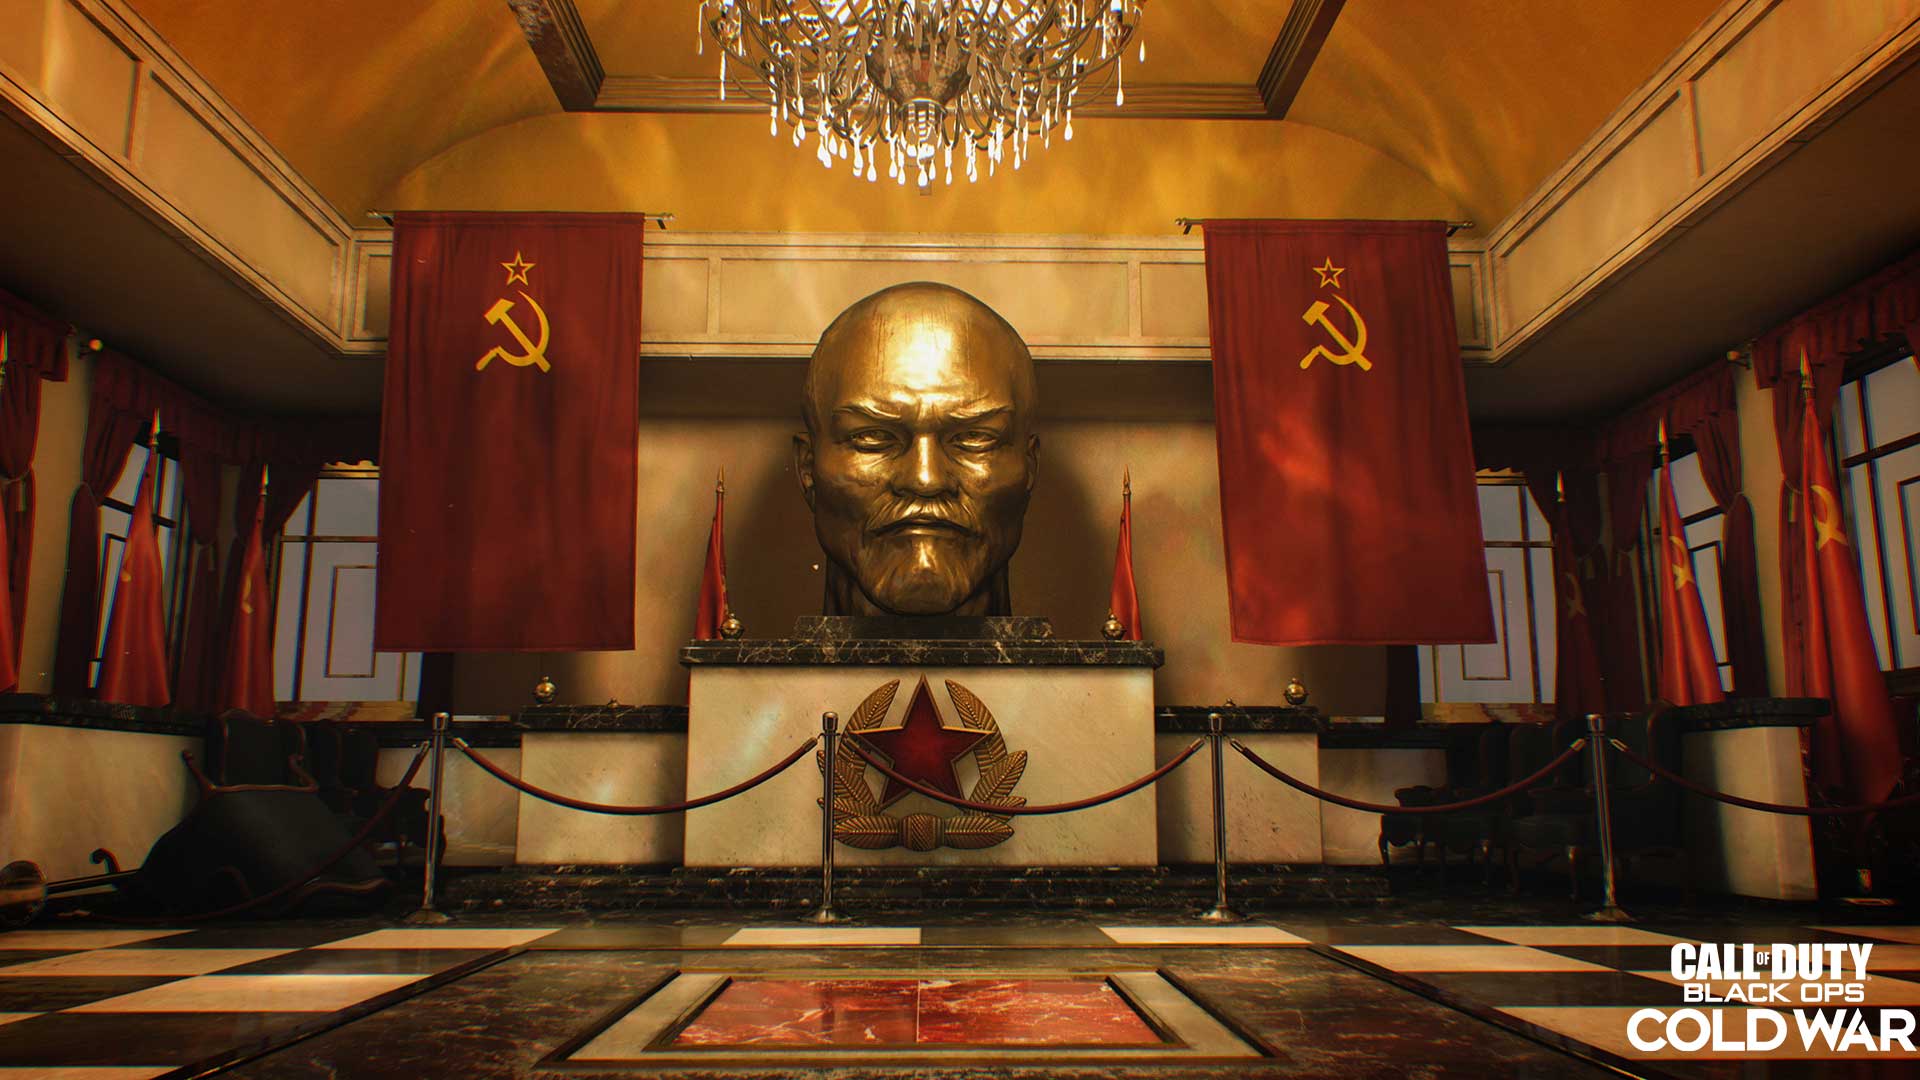
Moscow
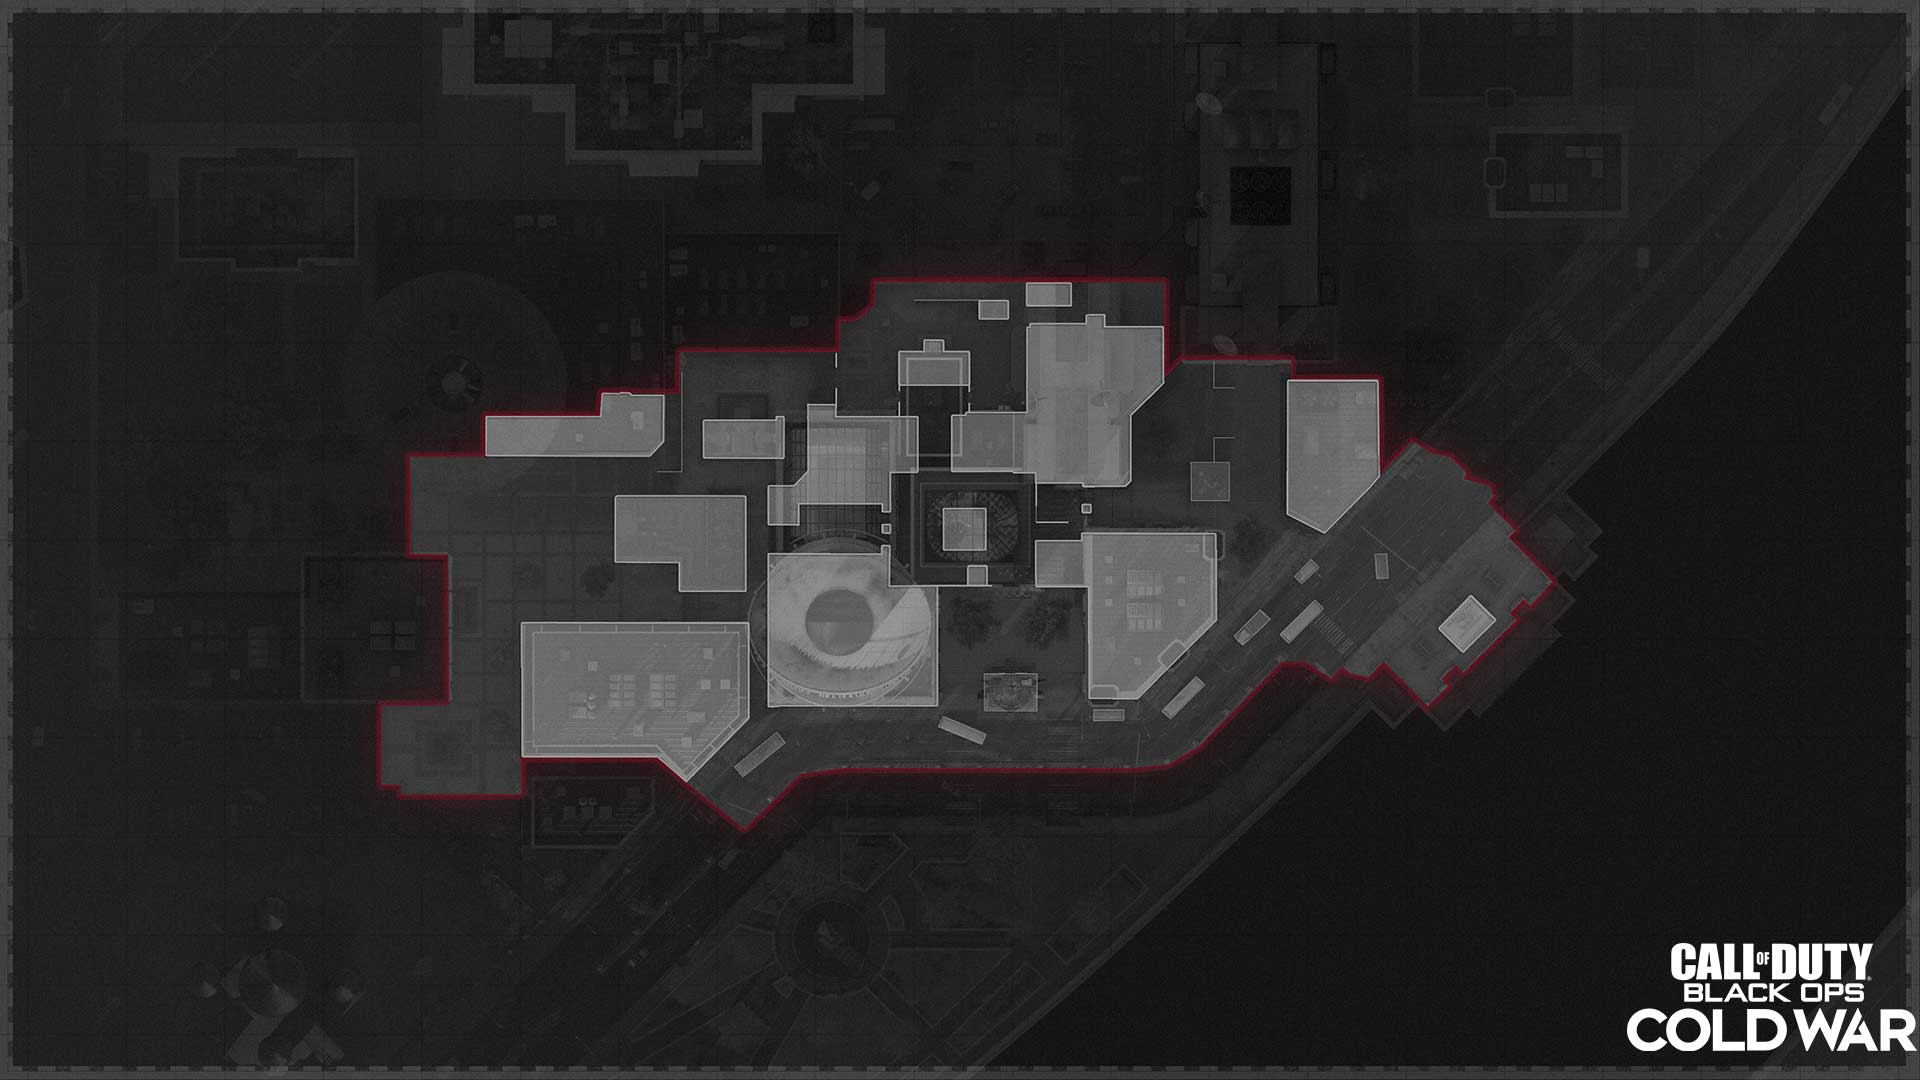
A CIA safe house in the heart of the U.S.S.R. has been compromised, prompting a Spetsnaz death squad to converge on its location. With crucial NATO intel and CIA operatives in danger of being handed over to the KGB, a CIA-JSOC team is dispatched to the scene, where initial reports suggest it has already gone hot with firefights breaking out on the streets.
Moscow is based around its Metro station; marble floors are seen throughout this complex, with a major monument to a Soviet leader dominating the center of its main hall. A golden bust can also be found up set of Escalators to the north.
Tips
1. Standoff at the Station
In most modes of play, the Metro will feature plenty of action. If you’re stuck in the middle of an intense firefight, use the massive central monument as cover, since it offers plenty of protection from any of the four main entry points.
2. A Convenient Place for a Window
Within the Office of the Hotel is a small window for a single Operator to squeeze through. This could be a great flank route for someone coming off the Boulevard, or as an opening for an equipment piece that could catch an enemy by surprise.
3. Escalated Combat
The Escalator side of the Metro can often be used to flank squads pushing in from the westside Hotel. If you can’t counter this by locking down the map’s northern route, try placing a Field Mic near this area to know when an enemy is coming for a flank. Or, learn how to throw equipment pieces up through the narrow gap between the ceiling and the Escalators themselves.
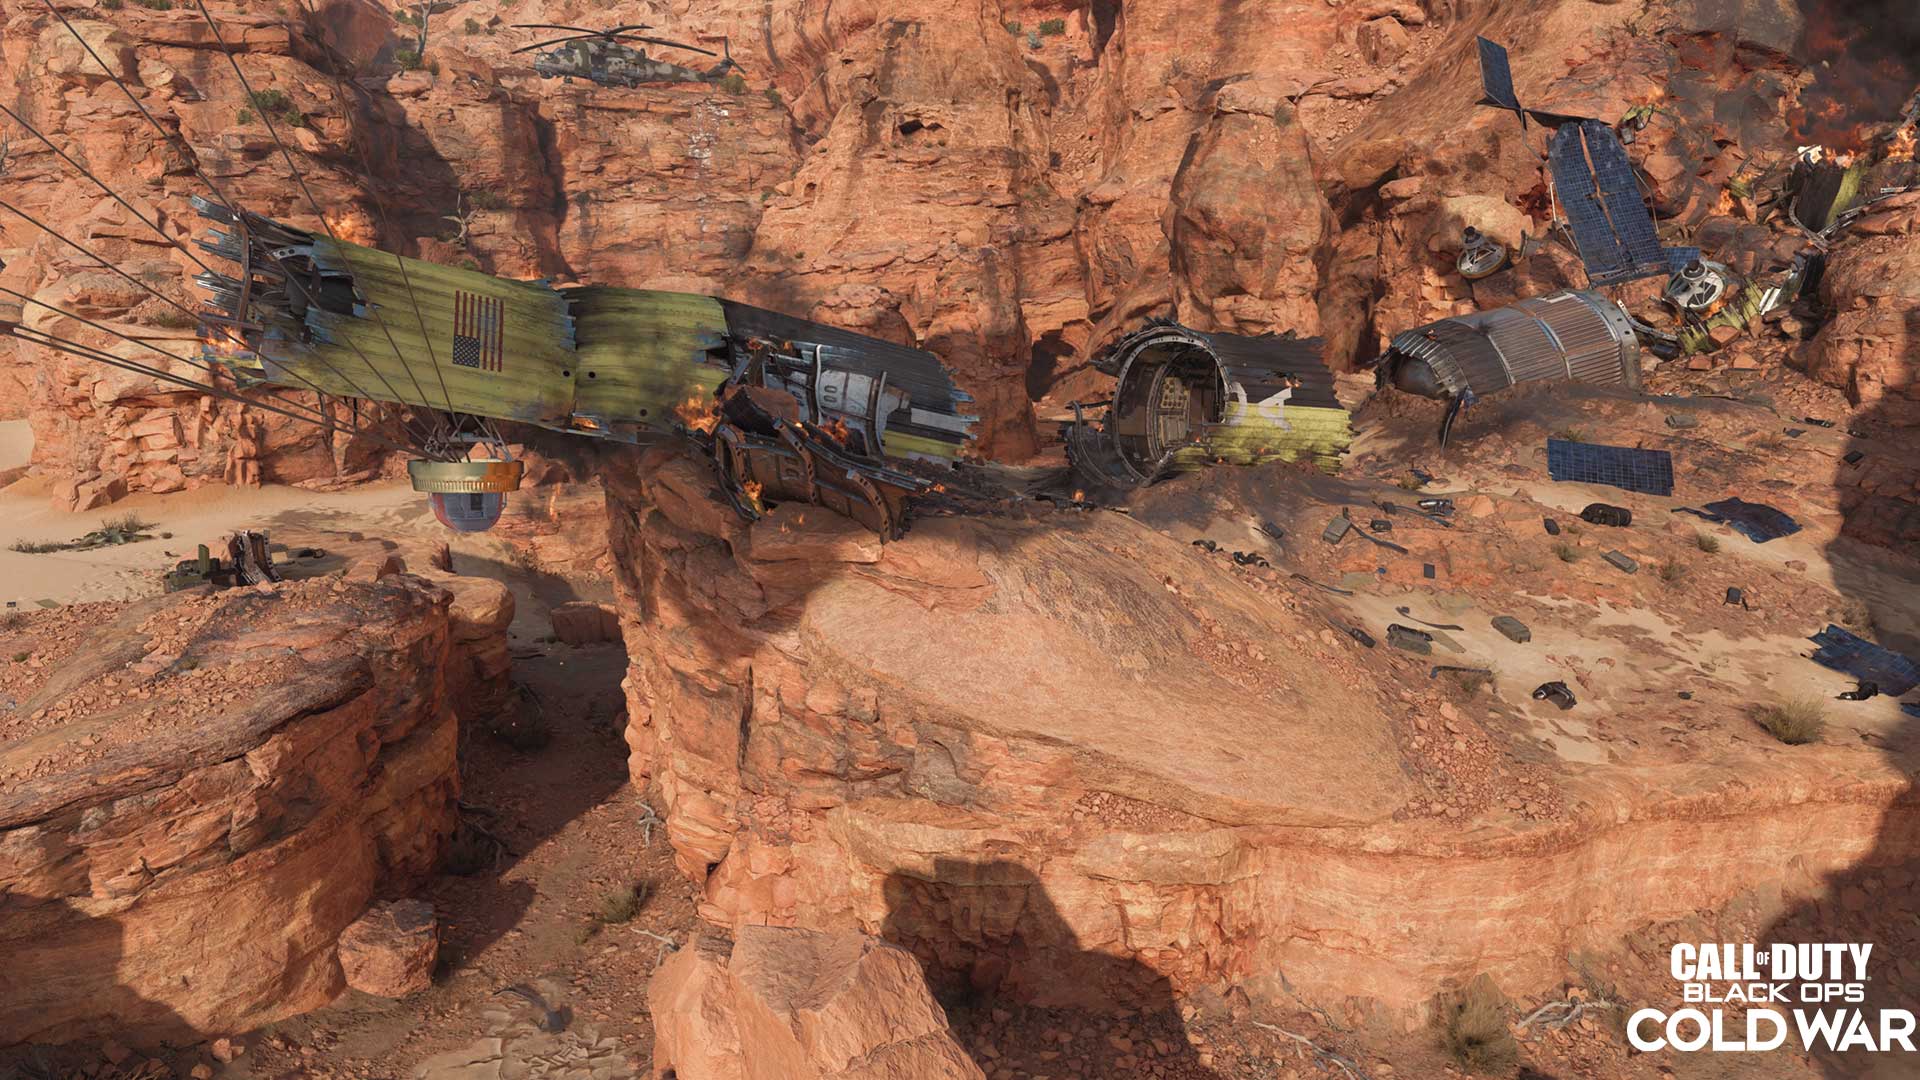
Satellite
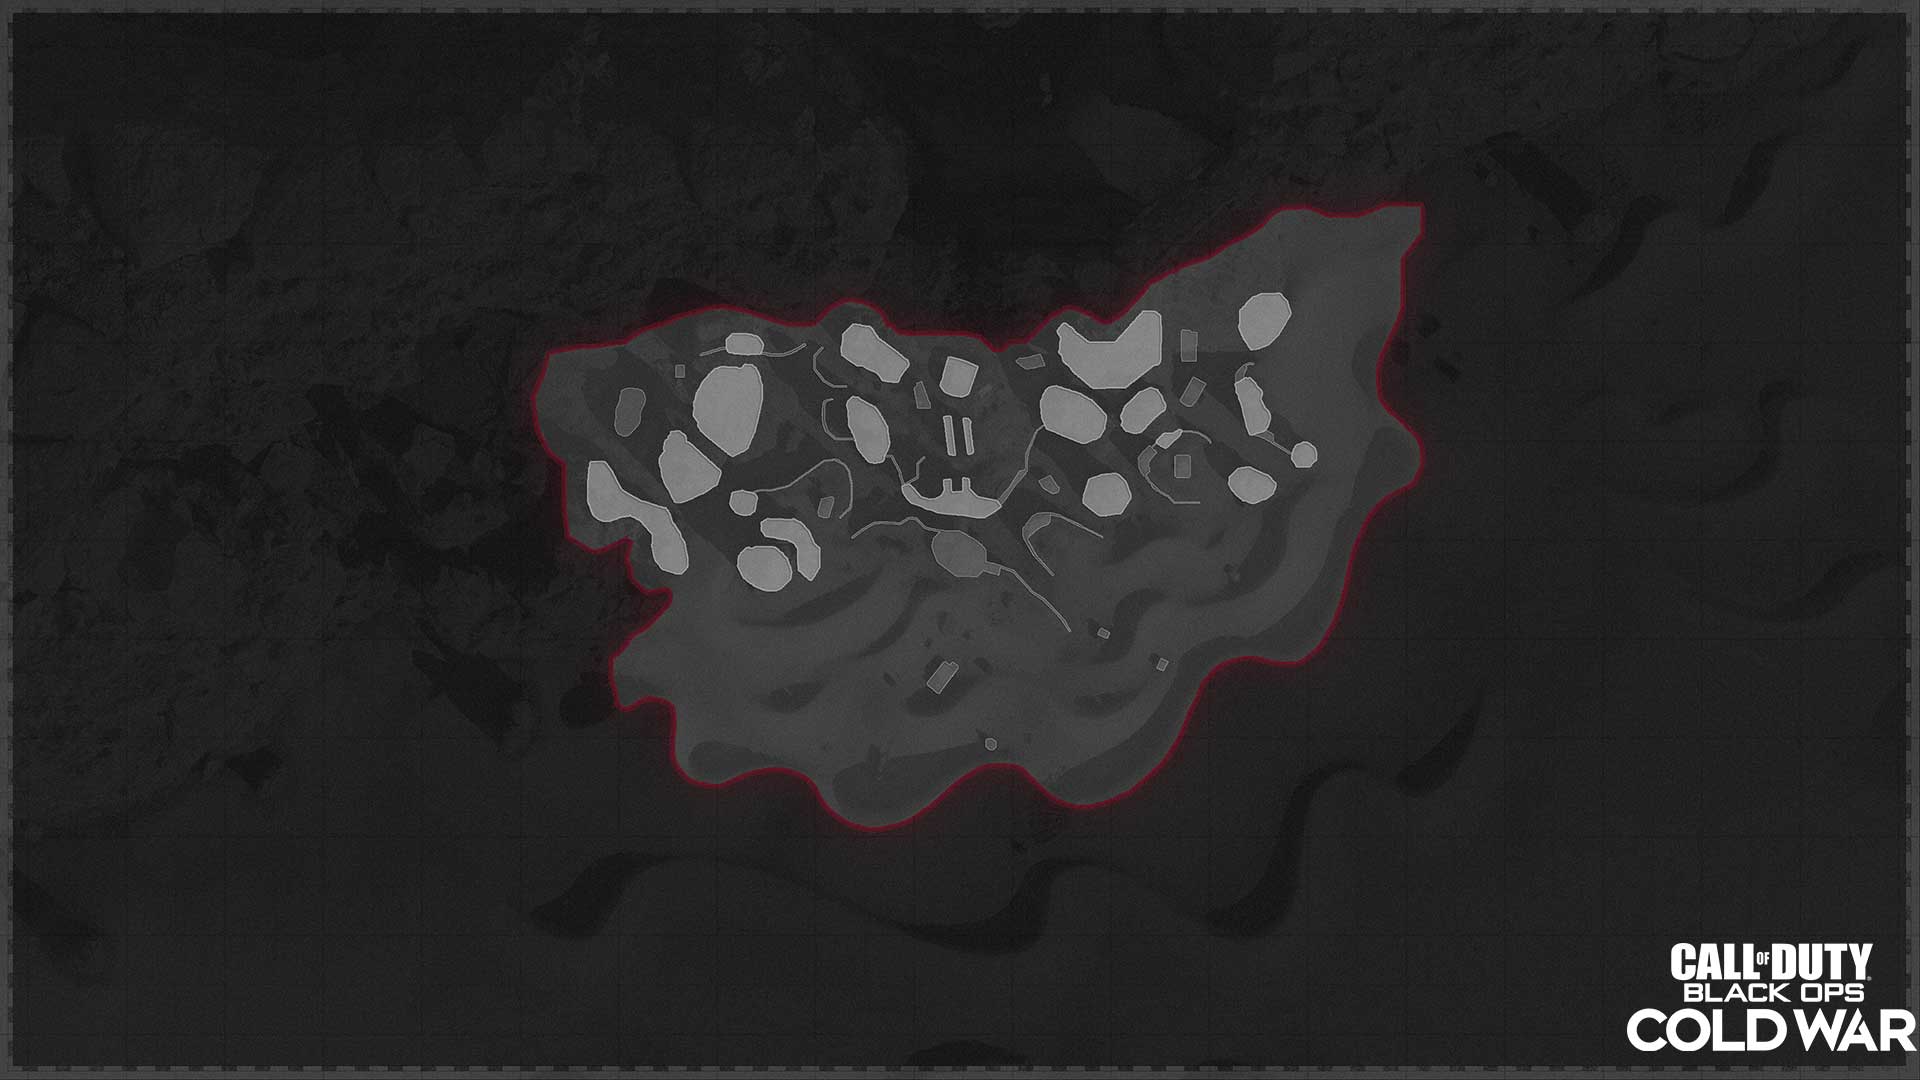
A KH-9 American-made satellite has been downed in the middle of an Angolan Desert. Soviet-hired DGI forces were tasked at salvaging this machine due to the sensitive intel it holds, but as they arrive, NATO’s MI6 squadron is here to interfere and recovering the satellite for their top ally.
Those who want to avoid the Satellite entirely can head for the Dunes, which have its own Wreckage at the center. Along with a few additional satellite parts, cargo, and a broken truck, the main source of cover here will be a few rocks and the hills of sand.
Note: Satellite is the only map to not use any buildings in its design, opting instead to structure itself around natural hills, rocky cliffs, dry riverbeds, and caves.
Tips
1. A Natural in Close Combat
Shotguns, SMGs, and other tools for close-range combat find more success in and around the cave systems and the Satellite. Given that there are plenty of open sightlines for all weapon types to take advantage of, it’s best to stick close to these structures and move between cover rather than challenge enemies outside your weapon’s effective range.
2. Death Among the Dunes
Snipers and other long-range weaponry are not only great for combat within the Dunes areas, but also from the Dunes over to the Satellite. Should the enemy team have a lockdown on that busy central area, take to the Dunes and find those angles to turn the tide for the rest of the squad.
3. Sun, Sand, and Scorestreaks
A lack of buildings makes Satellite an incredible map for aerial Scorestreaks. Don’t want to deal with a potential onslaught of these powerful attacks? Ensure you have a launcher equipped for dealing with helicopters and planes and consider using the Air Patrol Scorestreak to completely shut down the skies when the enemy is starting to dominate.
This wraps up a general overview of every map available at launch. More detailed breakdowns are to come as more locales are introduced to Black Ops Cold War. But for now, this intel should prepare you and your squad for the next operation.